
Home Tours & Reveals
Our Backyard Renovation Reveal: A Nancy Meyers-Inspired California Backyard
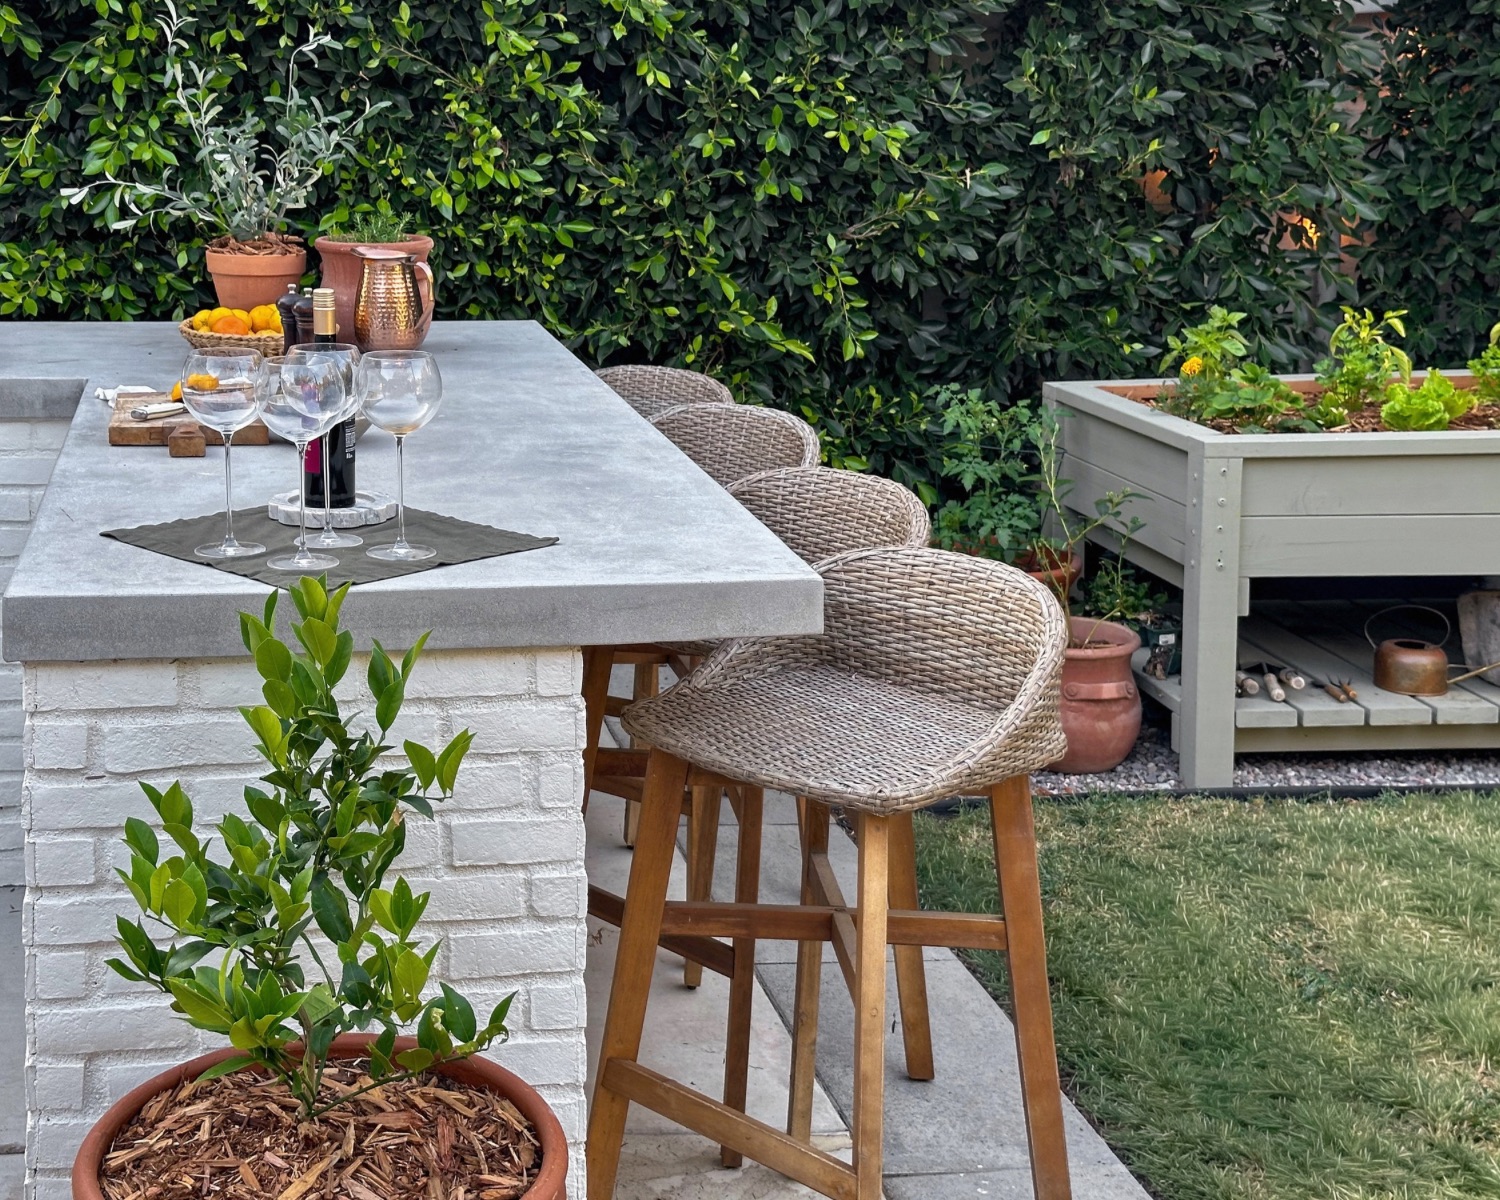
Our Backyard, Before & After
Over the past five years, we’ve transformed our once-dated California backyard into a charming, Nancy Meyers-inspired outdoor retreat, complete with inviting entertaining spaces, lush landscaping, and timeless design details. With the majority of the renovation completed ourselves, this transformation has been a labor of love, and one that’s still a work in progress! Take a look at the full before-and-after, including the projects, materials, and thoughtful updates that have brought our dream backyard to life.
When we were house hunting, there was something about this backyard that stopped me in my tracks. Not the patio, the lawn, or even the house itself. It was the trees. On our roughly 7,300-square-foot lot sat a beautiful old avocado tree, two orange trees, and a huge magnolia that casts shade over nearly half the yard. The space needed plenty of work, but the trees made the property feel established before we had done a single thing to it.
You can change almost everything about a backyard, but you can’t fast-forward decades to create mature trees. I knew we had something special to work with, and from the very beginning, I wanted to make those trees the focal point rather than design around them as obstacles.
Five years later, that once-neglected yard has become one of the most-used spaces in our home. It’s where we gather with friends, eat dinner outside, watch our kids play, and now grow some of our own food. It’s not finished, and I’m not sure it ever truly will be. But I love seeing how far it’s come.
Our renovation was also featured in People and on Realtor.com. I wanted to share a more detailed look at our backyard before and after here, including the parts we tackled ourselves, what we hired out, what we changed our minds about, and the little details that made the biggest difference.
The Inspiration Behind Our Backyard Design
My inspiration has always been a mix of the Nancy Meyers aesthetic and the relaxed sophistication of a Montecito ranch. What I love about those movie homes is how warm and timeless they are: polished but never stuffy, comfortable, and clearly made to be lived in.
I pictured lots of layered greenery, white flowers, natural textures, a white brick outdoor kitchen, and different places to gather. Most importantly, I wanted everything to feel like it belonged with those beautiful, established trees. The goal wasn’t to make our modest California lot feel like a completely different property. It was to bring out its character and create that lush, lived-in feeling on a realistic budget.
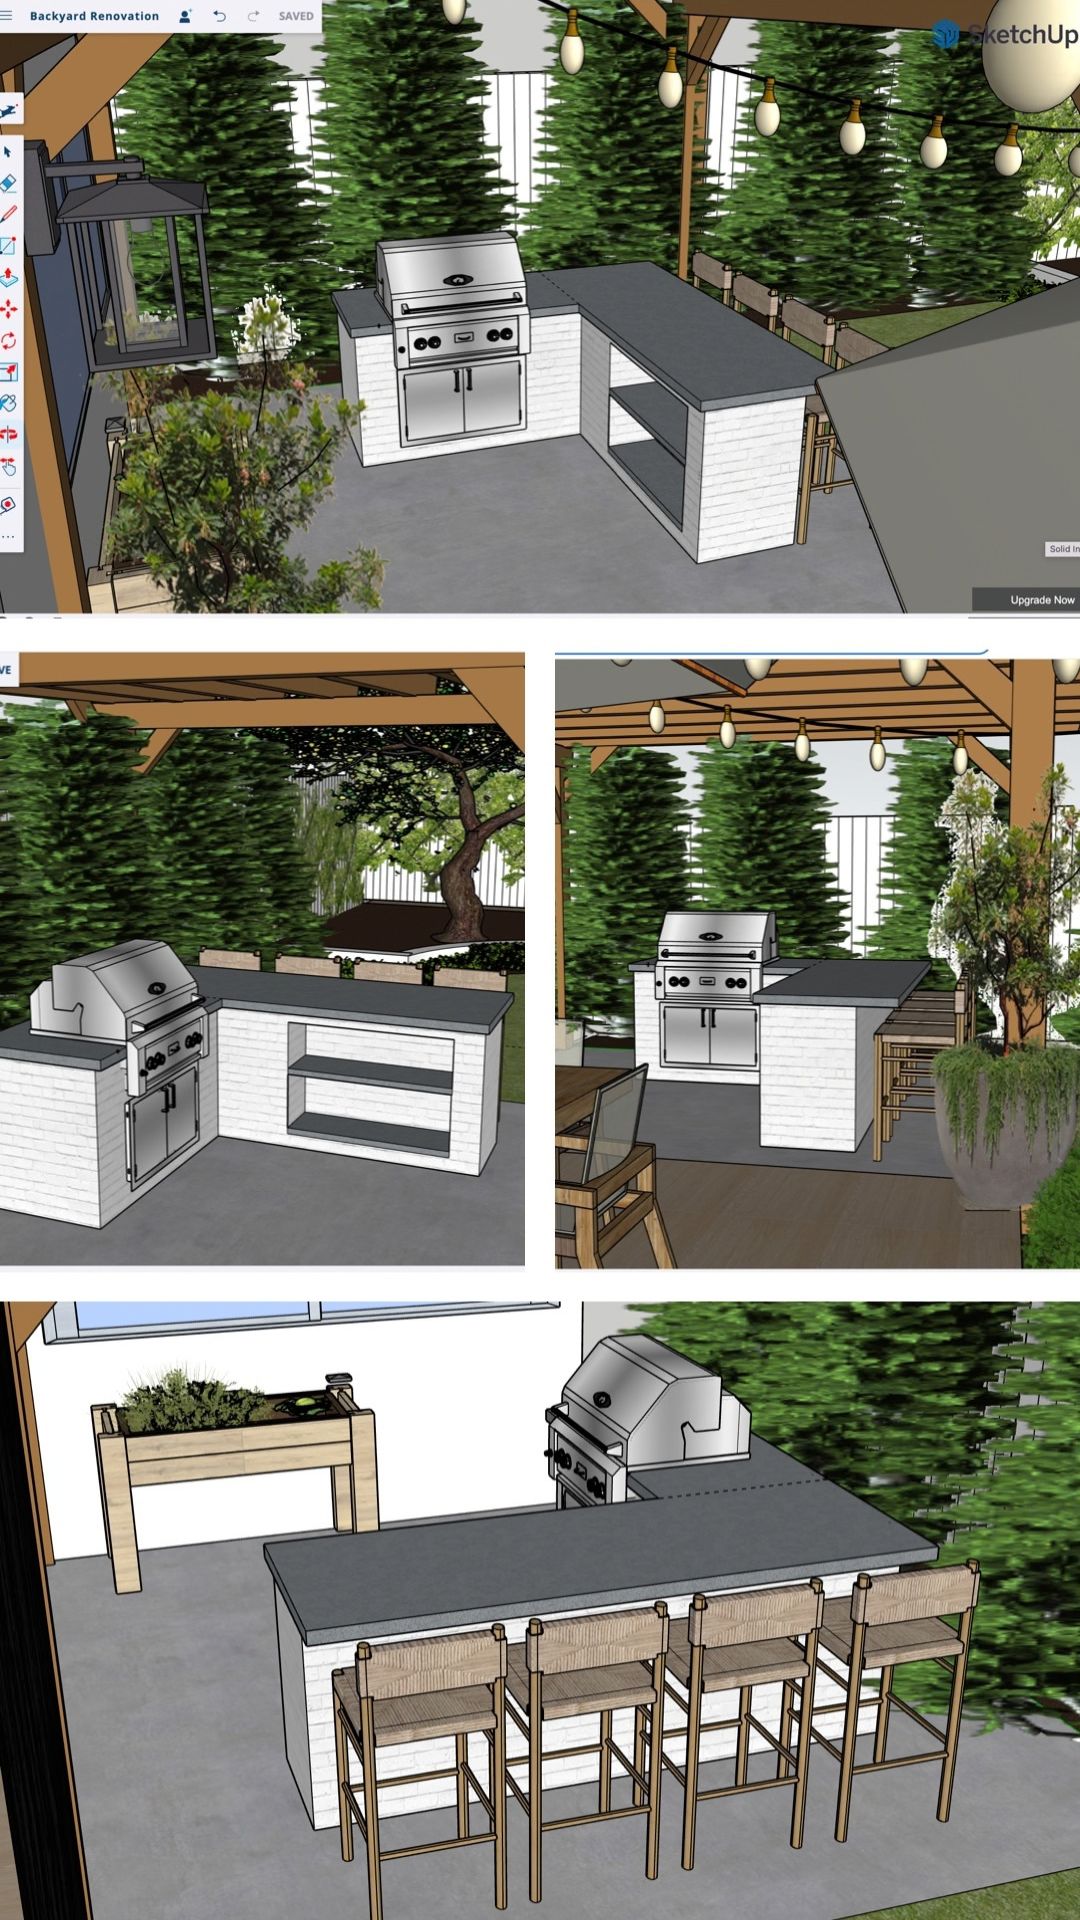
I designed the backyard myself and made a 3D rendering before we started the major construction projects. Seeing the layout in design software helped me think through how the outdoor kitchen, deck, seating, and lawn would connect. Of course, our plans changed as we actually lived in the space, and as our family grew. I’ve learned that a design can be carefully thought through and still need room to evolve.
Our Backyard Before the Renovation
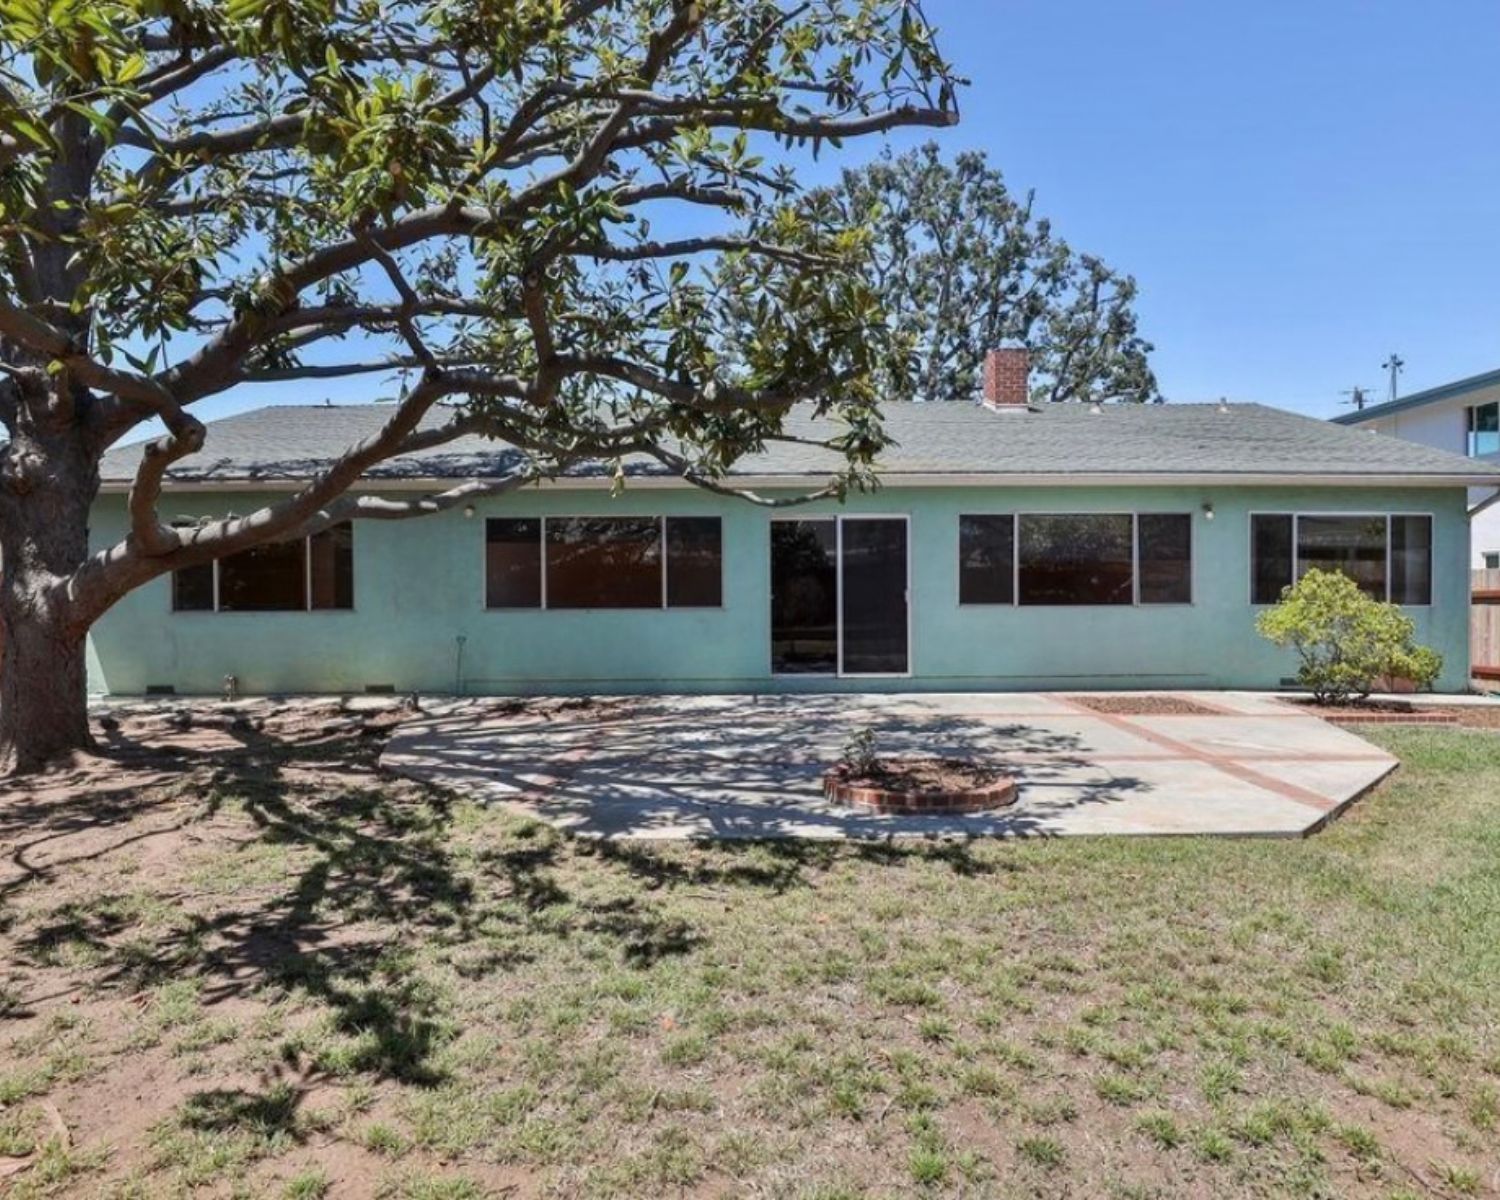
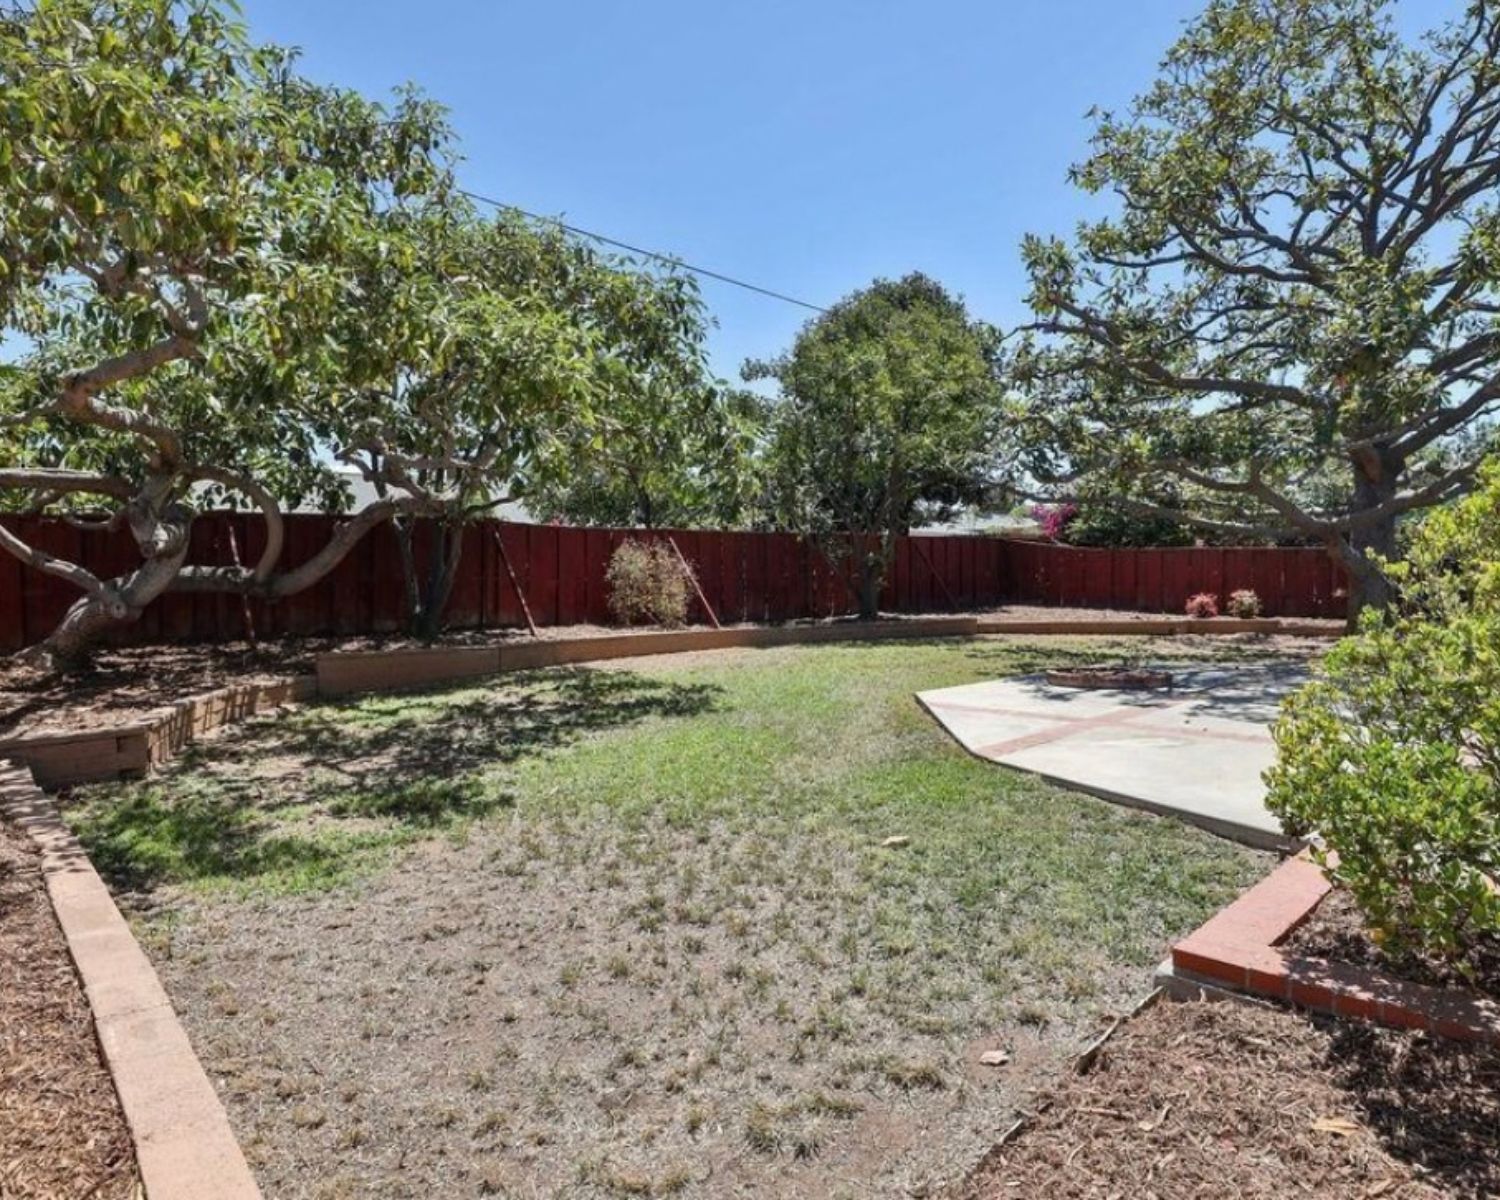
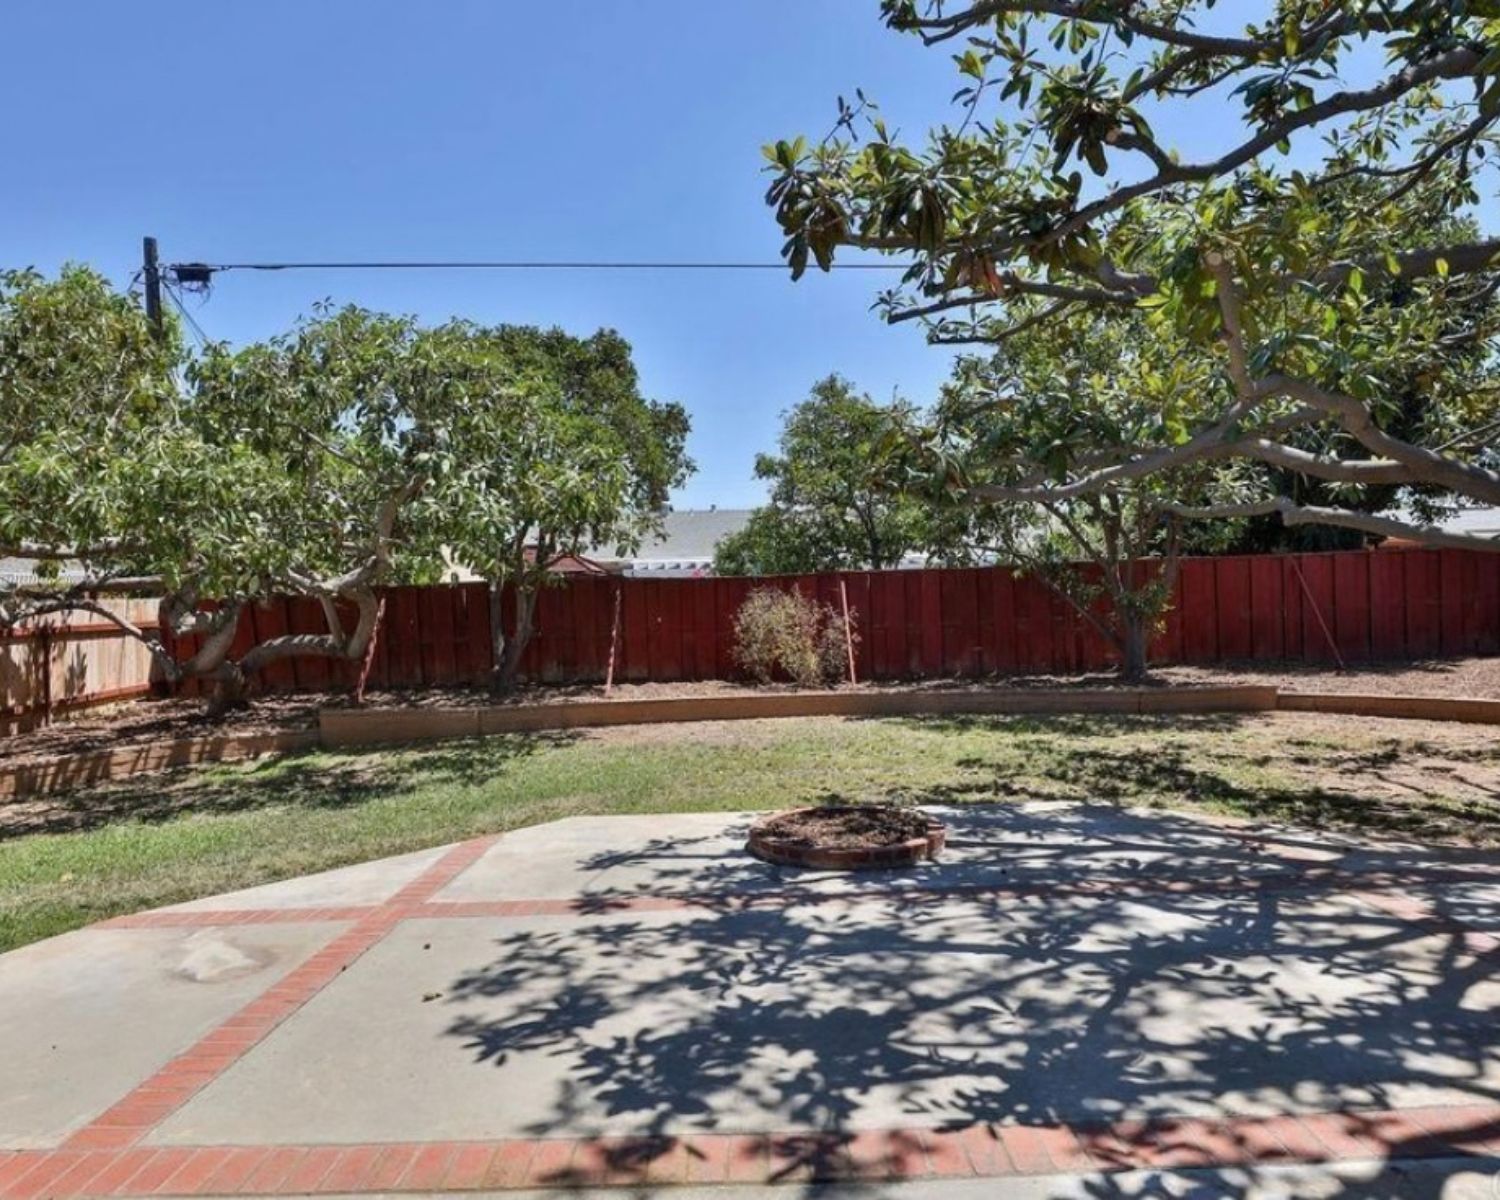
The yard we started with looked nothing like the one we have today. The concrete patio was cracked and dated, the grass was patchy, the red fence was deteriorating, and the beige retaining wall felt heavy against the rest of the space. On top of that, our neighbors’ two-story homes looked directly into the yard, so privacy was a big priority.
What I didn’t want to change were the trees. The magnolia in particular already created the kind of natural canopy you can’t simply buy or build. The avocado and orange trees added so much character, too. My challenge was figuring out how to connect everything visually: soften the hardscaping, add privacy, bring in more greenery, and create purposeful areas for relaxing and entertaining without sacrificing an open lawn.
Our Five-Year Backyard Renovation Timeline
We bought our house in the fall of 2021, and our first priority was getting the inside livable. By Christmas we were finally no longer living with exposed walls and rafters! We spent most of 2022 working on the interior, so the backyard had to wait. We also had other renovation projects going on, and we knew this wasn’t going to be something we completed in one big push.
Instead, we approached it one phase at a time. We’d save for the next project, do as much of the work ourselves as we realistically could, and hire professionals for the jobs that called for special skills or would simply take too much time. Here’s how those phases came together:
- Fall 2021 to 2022: Bought the house and focused on renovating the interior.
- Winter 2022 to 2023: Began clearing the backyard, addressing drainage and a leaking irrigation pipe, and planting our first clover lawn from seed.
- Summer 2023: Built the original large wood deck and poured a concrete slab beside it, originally planned as a simple place for a grill.
- 2024: Reworked the layout for a built-in outdoor kitchen and bar; cut back the deck to create more lawn; expanded the concrete for seating; installed the fence, fescue sod, full irrigation and drip system, market lights, planting beds, and privacy hedges.
- 2026: Added our raised kitchen garden, refreshed areas of the backyard, and started dreaming up the next projects.
Getting Started: Preparing the Backyard
The first phase was by far the least glamorous. We spent weeks pulling weeds, clearing overgrown shrubs, digging, and hauling everything out by hand. It was winter, so the yard was muddy, and I was in my first trimester with our daughter. Between the nausea and exhaustion, this was not exactly my favorite part of the project!
At one point, while clearing the shrubs along the fence, we found what looked like a little pet grave. Naturally, we had questions. We carefully excavated the area but didn’t find anything, so if something had once been buried there, it was long gone. It was one of those odd discoveries you don’t expect to make while working on a backyard.
We also discovered a leaking irrigation pipe, and because our lot slopes, Ryan dug a trench along the side of the house for a French drain to help manage water and prevent flooding. None of this made for pretty after photos, but it was important groundwork for everything we wanted to do next.
Our Wooden Deck: Creating Indoor-Outdoor Living
One of my earliest design decisions was to build a deck instead of replacing the old concrete patio with another slab. The original concrete was cracked, and tearing it all out and pouring new concrete would have been more than we wanted to spend at that point. But cost wasn’t the only reason.
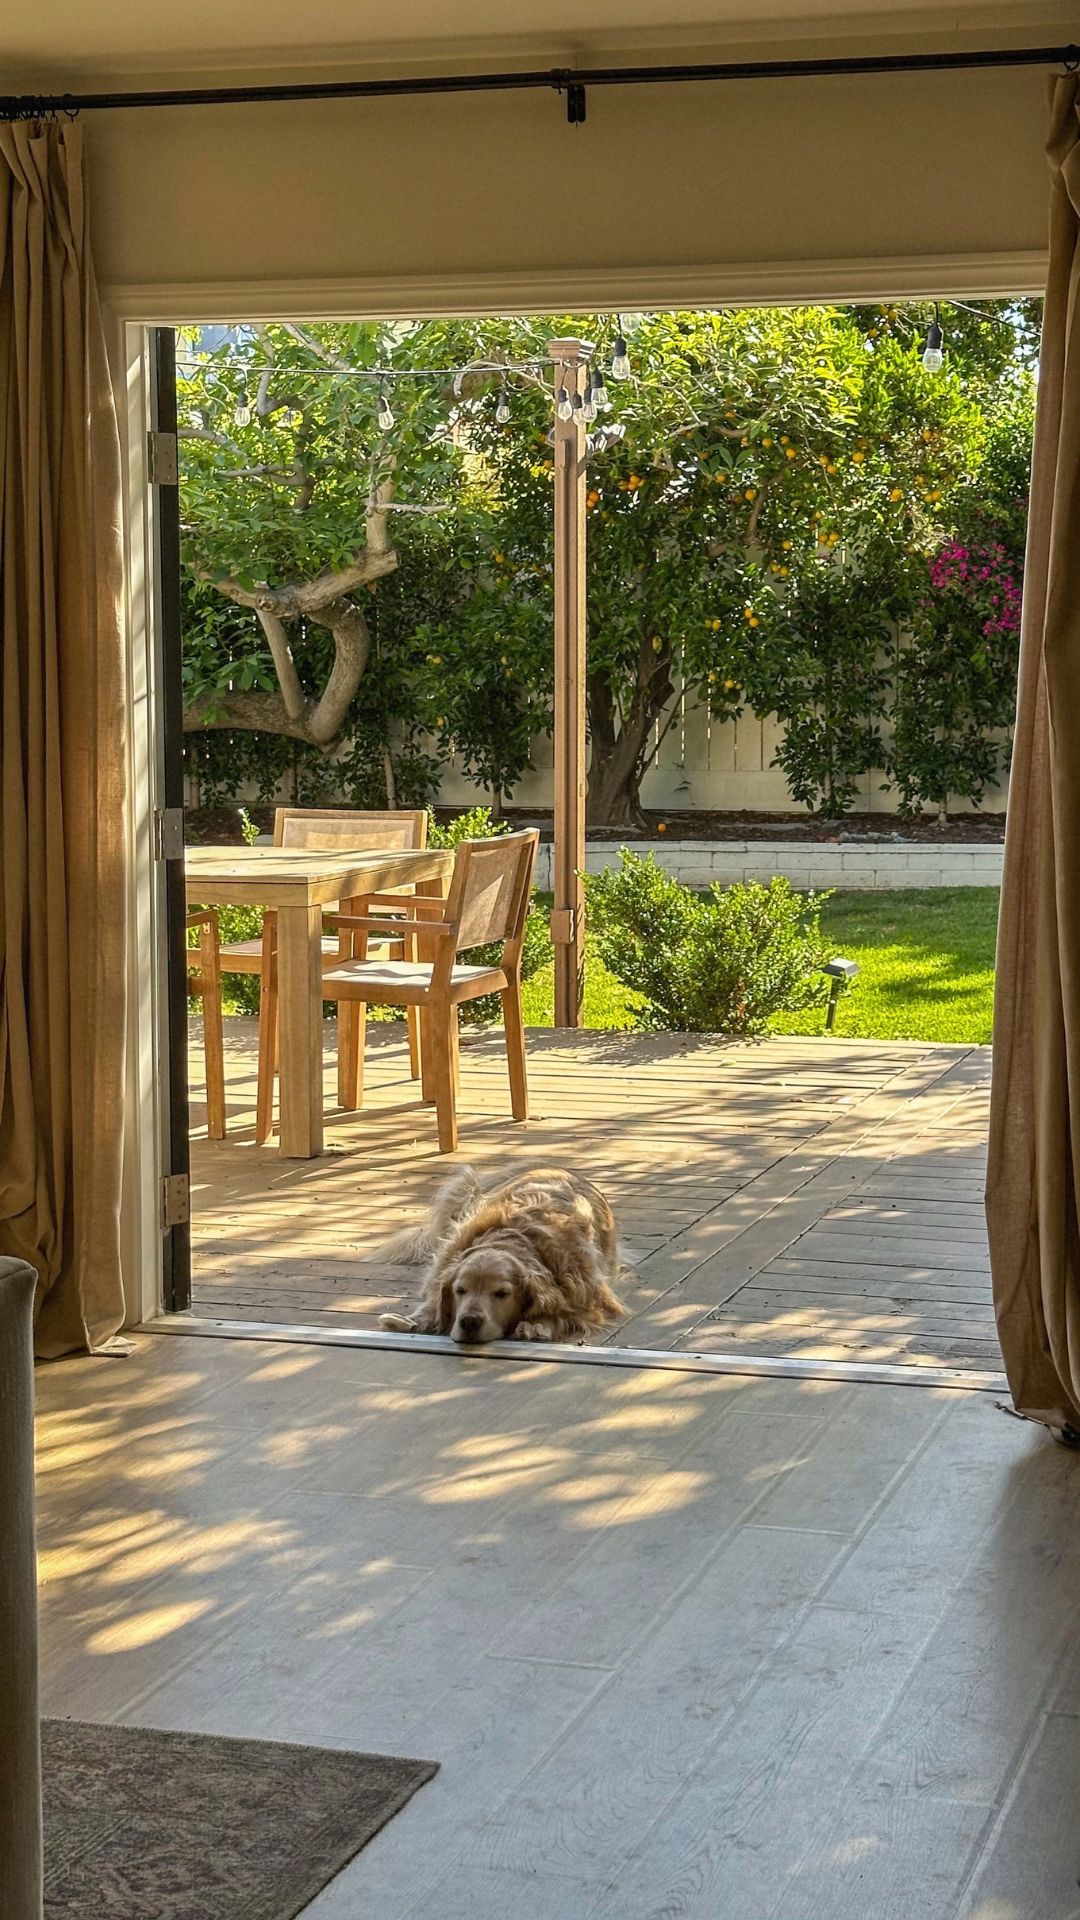
Because our home has a raised foundation, a new concrete patio would have meant stepping down from the back doors. I loved the idea of opening those doors and walking straight outside onto a deck that felt like a continuation of our interior floors. It’s such a small design detail, but having everything on one level makes the spaces flow together so naturally. It also makes hosting easier and gives little ones room to move in and out.
Ryan and his dad built the deck when I was about 34 weeks pregnant. We chose real, pressure-treated wood instead of composite because it was more cost-effective for us. We sealed the underside of the boards before installing them, sanded the top, and finished the deck with Behr solid exterior wood stain and sealer in Sandal. We applied two coats, allowing plenty of drying time between them, and I loved the warm wood tone it brought to the backyard.
Why We Eventually Made the Deck Smaller
Then we did something you might not expect: about a year later, we cut part of our new deck back. Once we had our daughter, we realized we wanted more open lawn than we’d originally planned. So we removed a section of the deck, broke up some of the old concrete, added irrigation, and made room for grass.
It felt a little funny to undo part of a project we’d worked so hard on, but living in a space teaches you things a rendering can’t. I still love the deck, and I think it works even better now because it has a more intentional relationship to the lawn.
Updating Our Fence and Retaining Wall
The first thing to go was a rotted, falling-over red fence that was a complete eyesore. We cleared out the entire fence department at the hardware store! The old fence came down almost too easily, suspiciously so. We also had to trim a few branches of our avocado tree to make room for the new one. I hated to do it, but it had to be done.
We set the new posts in concrete, framed the fence, and installed a 12-inch-wide board along the bottom before the pickets to make it a little taller for more privacy. After three days, the fence was nearly complete. Every time I say “we” here, I really mean Ryan. He sent me in to do what he likes to call “unskilled labor,” basically just drilling the screws. But hey, teamwork makes the dream work!
I stained the fence with Behr waterproof stain and sealer in Picket Fence White. The name alone is giving Nancy Meyers! It looks like a solid paint color, but it’s actually a stain. It took me about four hours of on-and-off staining between my daughter’s naps, and it made such a difference in how the whole backyard looked.
We also had this sad beige retaining wall that we really didn’t have the budget to replace or restructure. Our house is almost 70 years old, so my guess is the stones are about the same age! Rather than tearing it out, I painted it with Behr exterior masonry paint in Picket Fence White. It only took about an hour, and it was so worth it. I love projects like this where a little paint makes something old feel completely refreshed.
Shop Our Backyard
Choosing Our Lawn and Landscaping
Our Experience With a Clover Lawn
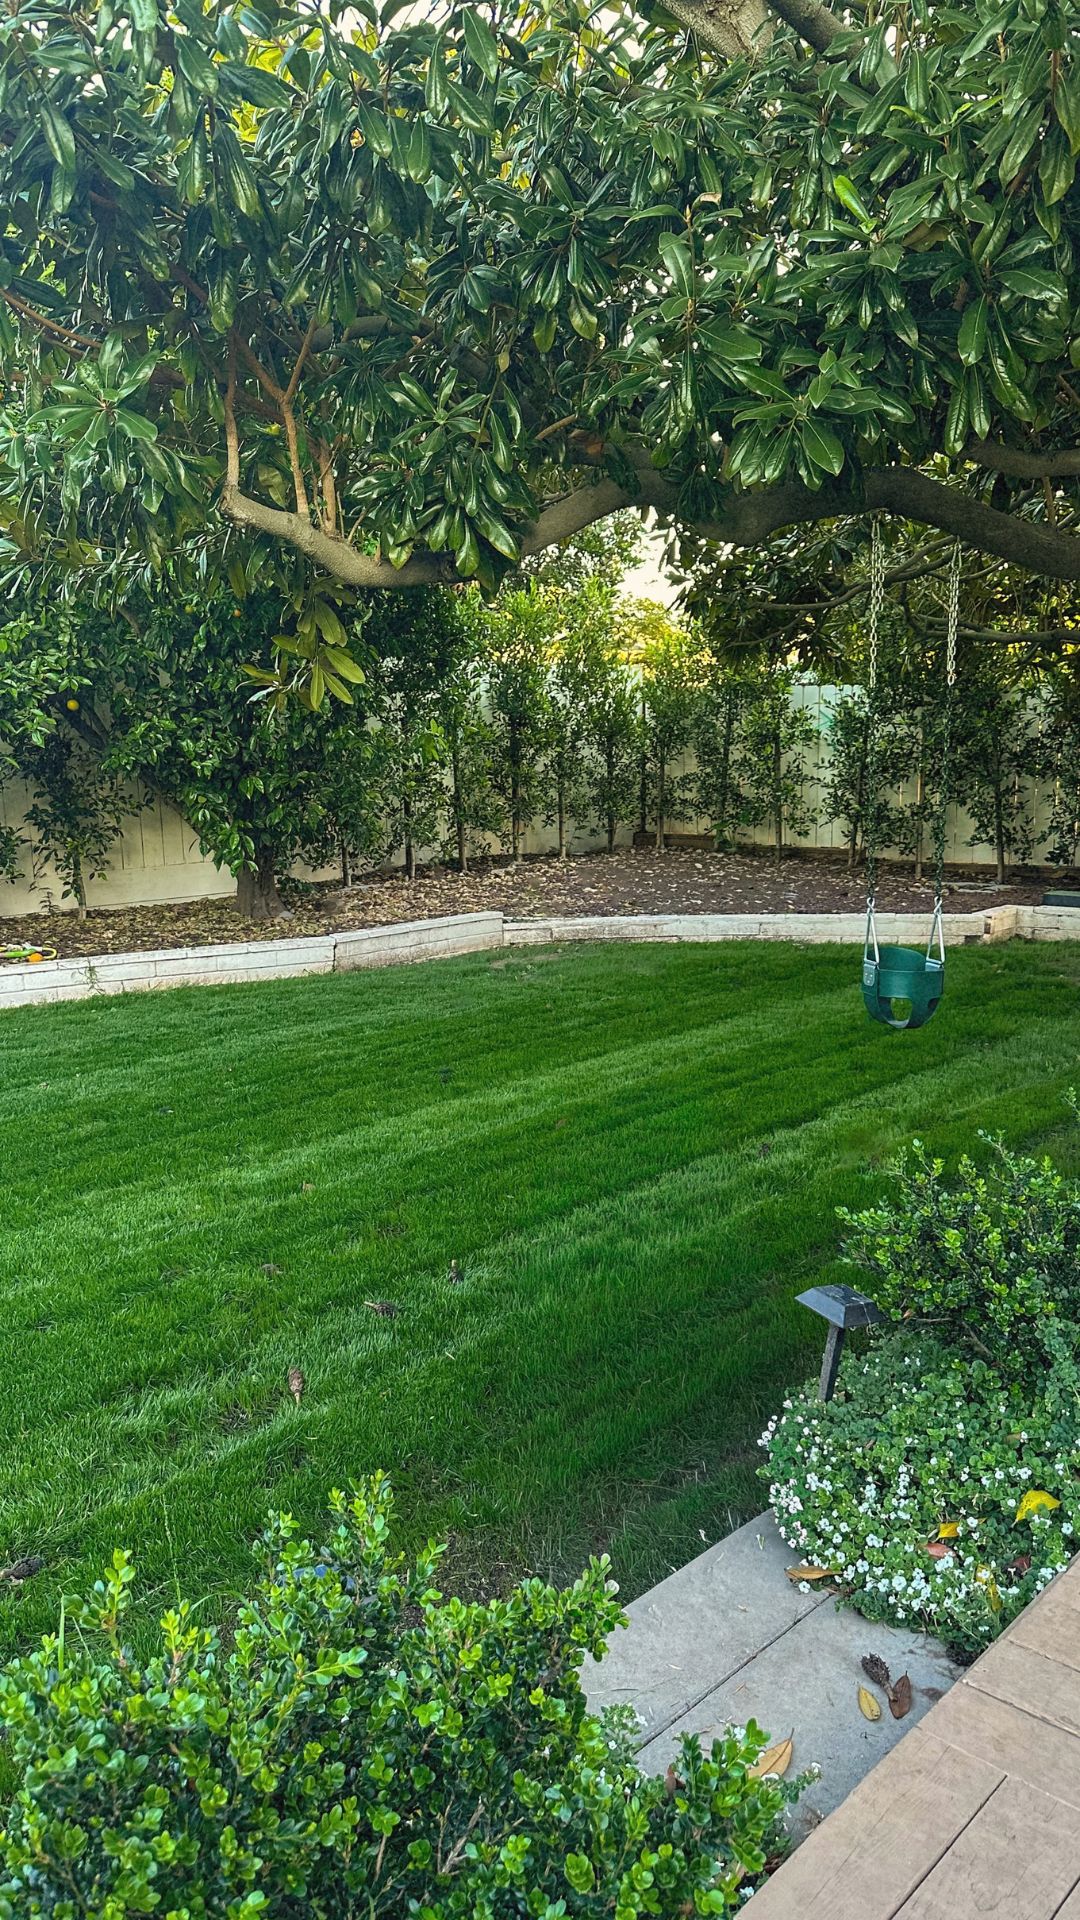
We first planted a clover lawn from seed in the winter of 2022 to 2023, using a blend of approximately 75% microclover and 25% Bermuda grass. We had two large golden retrievers and wanted some grass mixed in for extra resilience. At the time, I genuinely loved our clover lawn. It looked beautiful, stayed low-growing, and was a practical choice before we had an automated sprinkler system.
But our needs changed. Once we made the lawn larger and started thinking about the way our kids and dogs would use the yard every day, we wanted something better suited to heavier foot traffic. In 2024, we changed over to fescue sod. Because the clover had been grown from seed, we weren’t walking away from a huge investment, just the cost of a few bags of seed.
I would absolutely still recommend considering clover for a space with relatively light foot traffic. Our front yard was actually a great place for it, and I loved the look there. We eventually replaced that, too, because I wanted the front and backyard lawns to feel consistent.
If you’re drawn to a clover lawn, I especially like microclover over traditional white clover. It doesn’t flower and stays very small, so from afar it actually gives the appearance of grass.
Installing Our Irrigation and Drip System
One of the biggest behind-the-scenes projects of 2024 was our irrigation system. Ryan installed the irrigation and drip lines throughout the backyard himself, and it took weeks. It may not be the most exciting part of a renovation to photograph, but after investing so much time and money into the landscaping, having our lawn and planting beds watered automatically has been so worth it. Not having to manually water the whole yard every day is a huge relief!
Creating Our Garden Beds
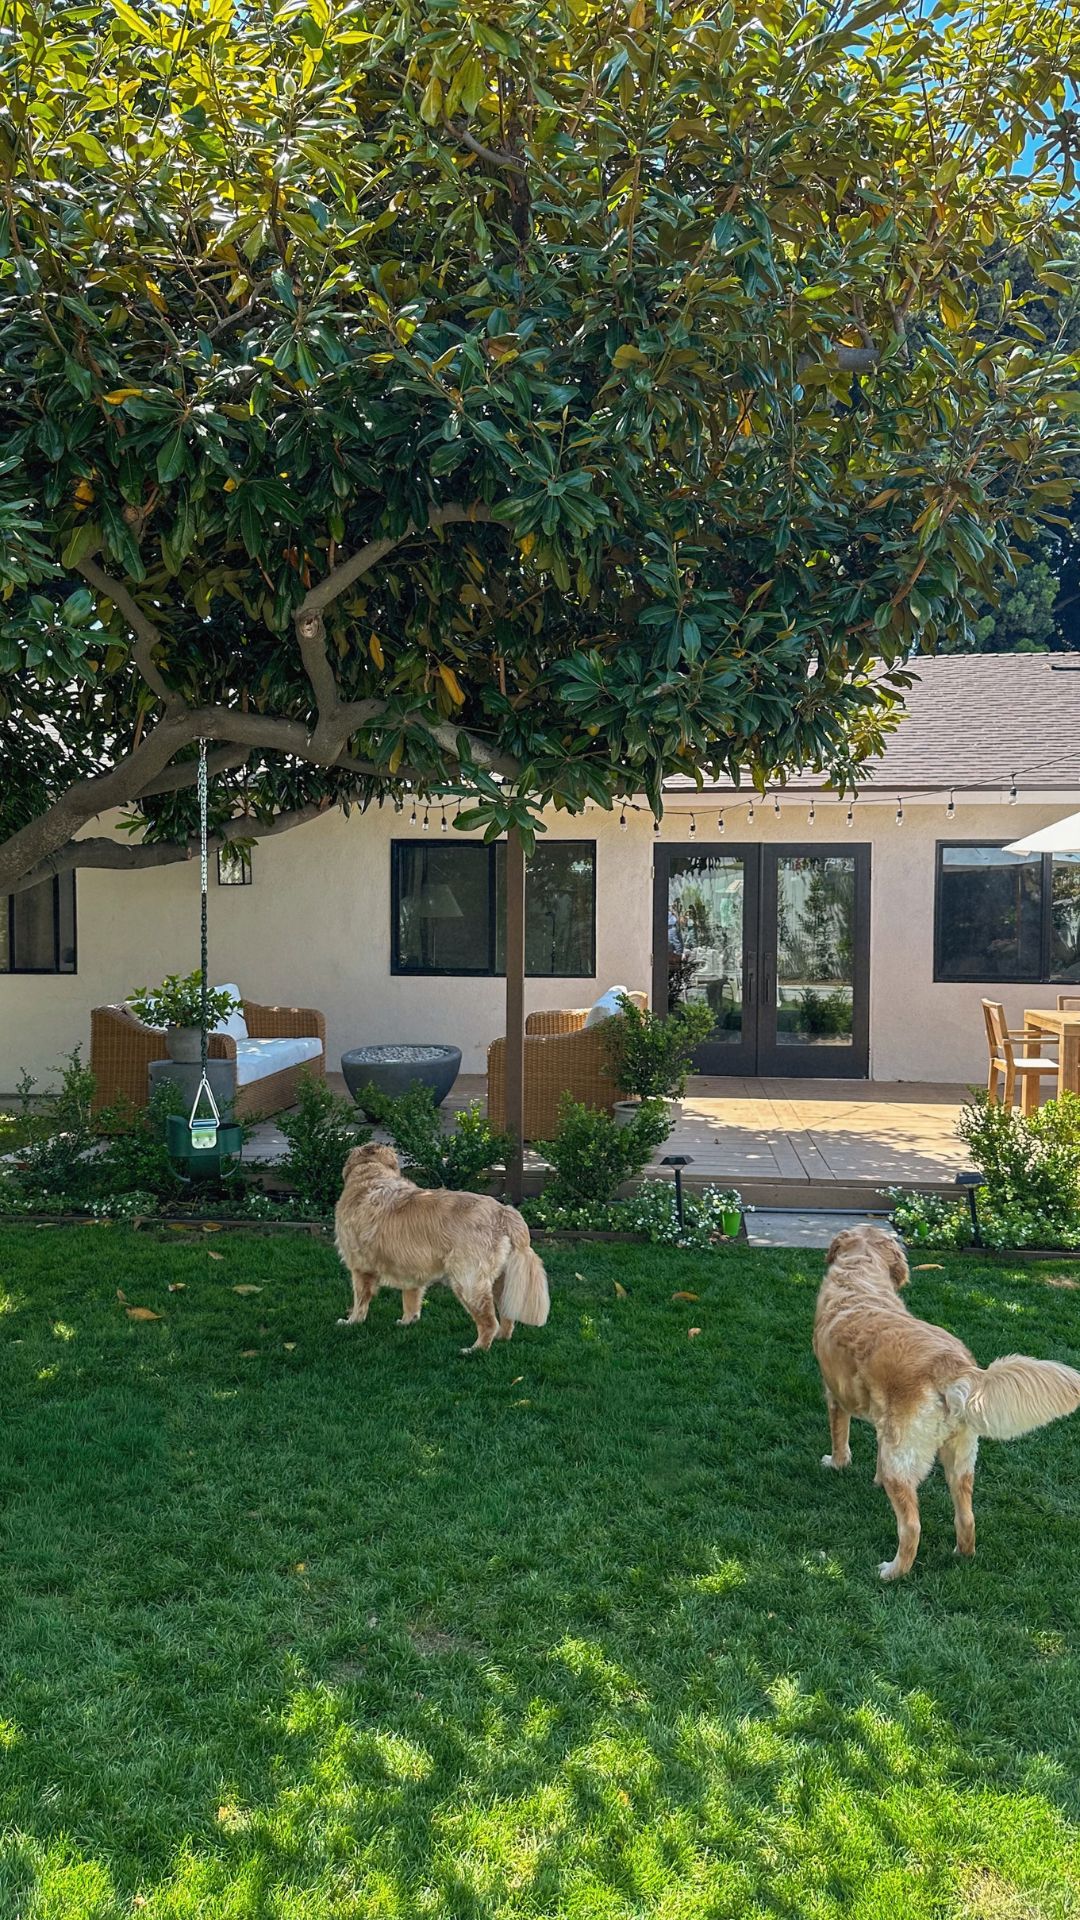
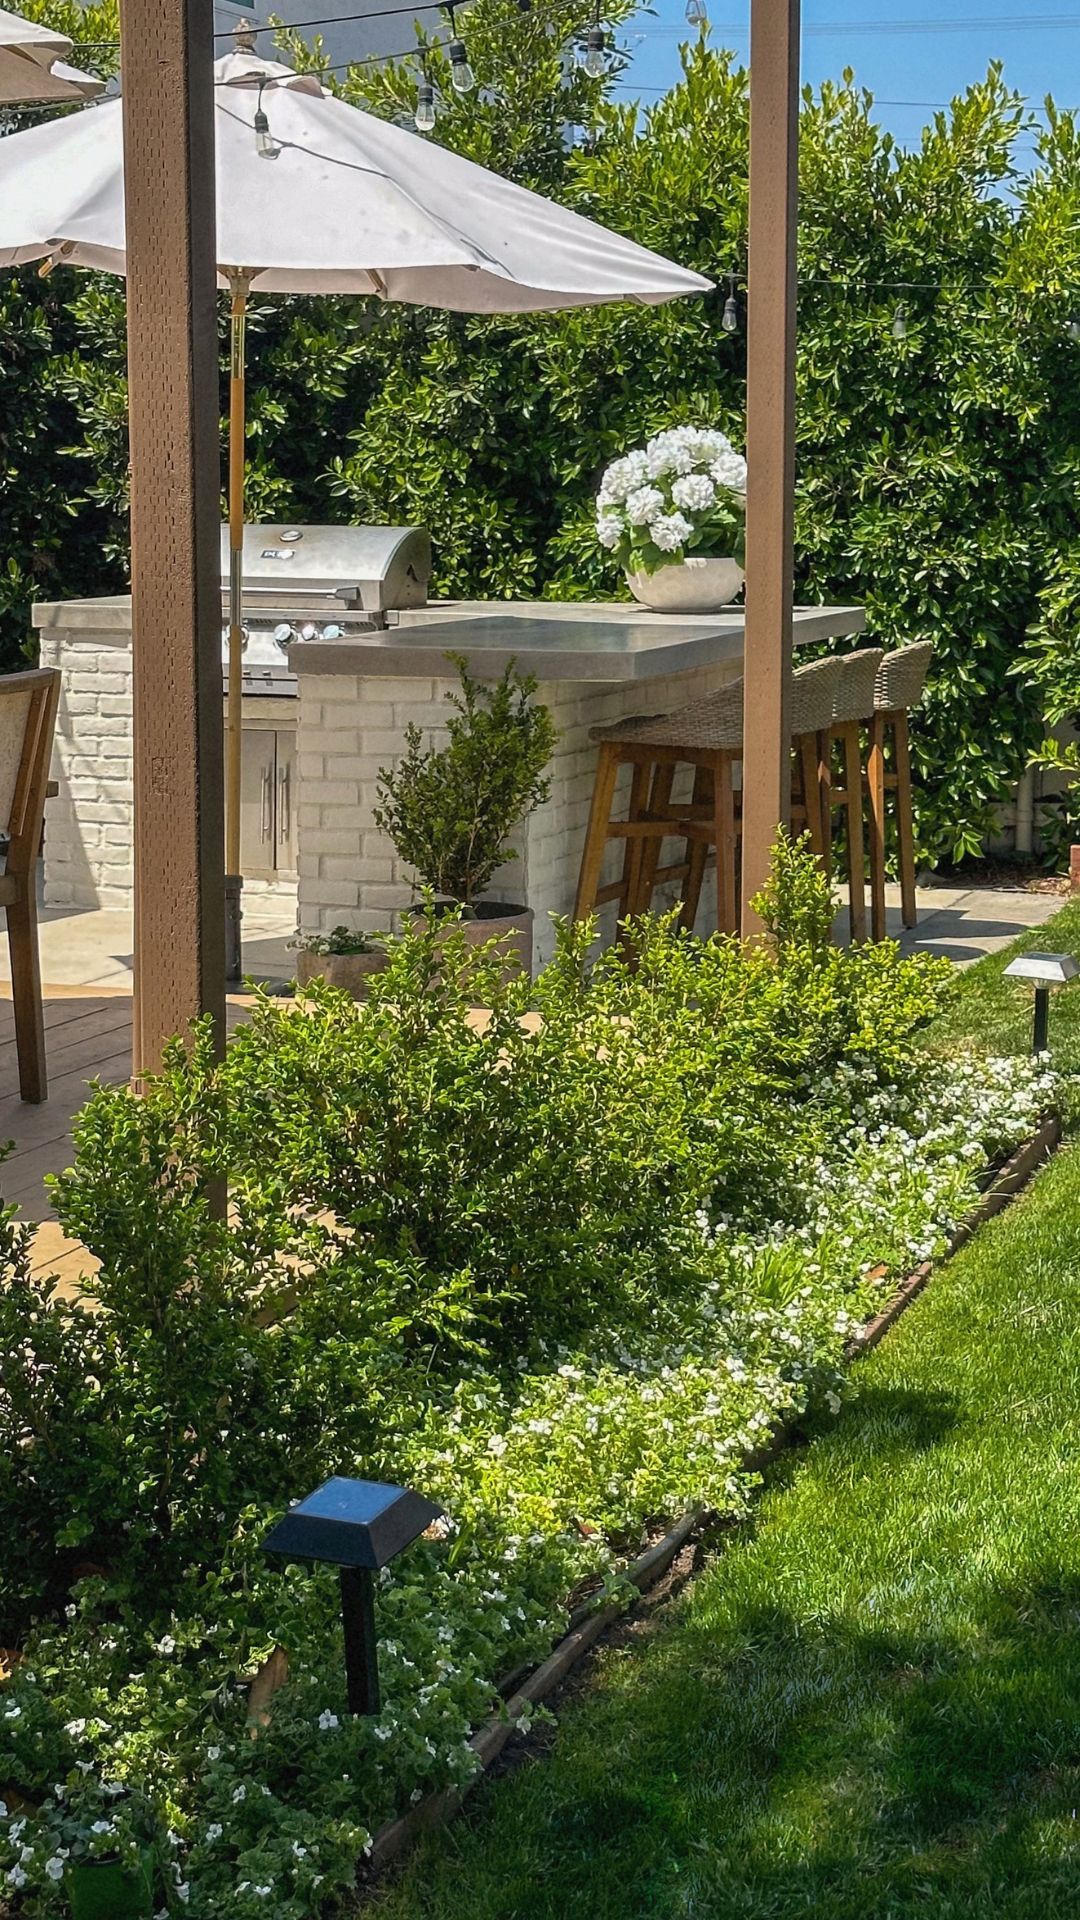
I wanted the landscaping to feel lush but still calm and cohesive, so I stayed mostly with greenery and white blooms. Around the deck, I planted Green Beauty boxwoods to create structure, with white bacopa along the front of the beds. The goal is for the boxwoods to mature into a defined border while still letting the rest of the plants feel soft and natural.
We installed a drip system and weed barrier, then filled the beds with mulch. People are very passionate about mulch color, and I, for one, think brown mulch is superior. I think Teddy agrees! It’s honestly impressive how much difference mulch makes. Everything looks so much more put together, and all the colors look more vibrant. I also added little lawn lights on the corners of the beds by the deck.
Our Outdoor Kitchen and Bar
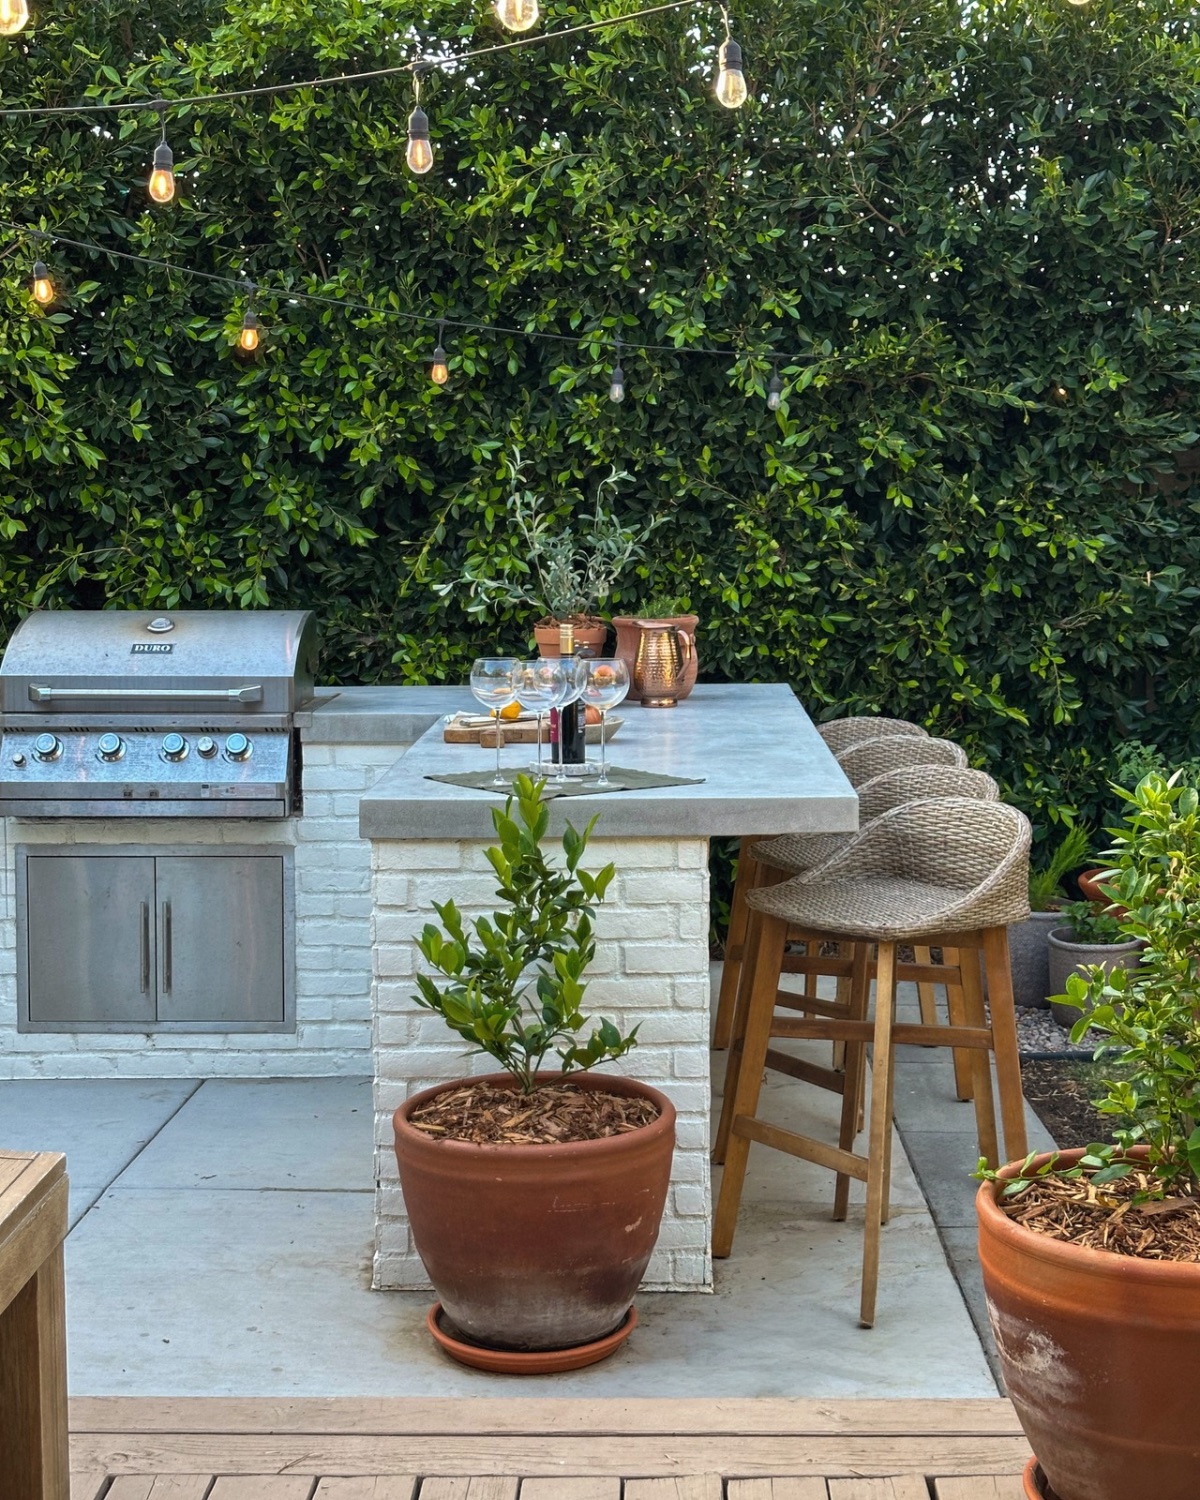
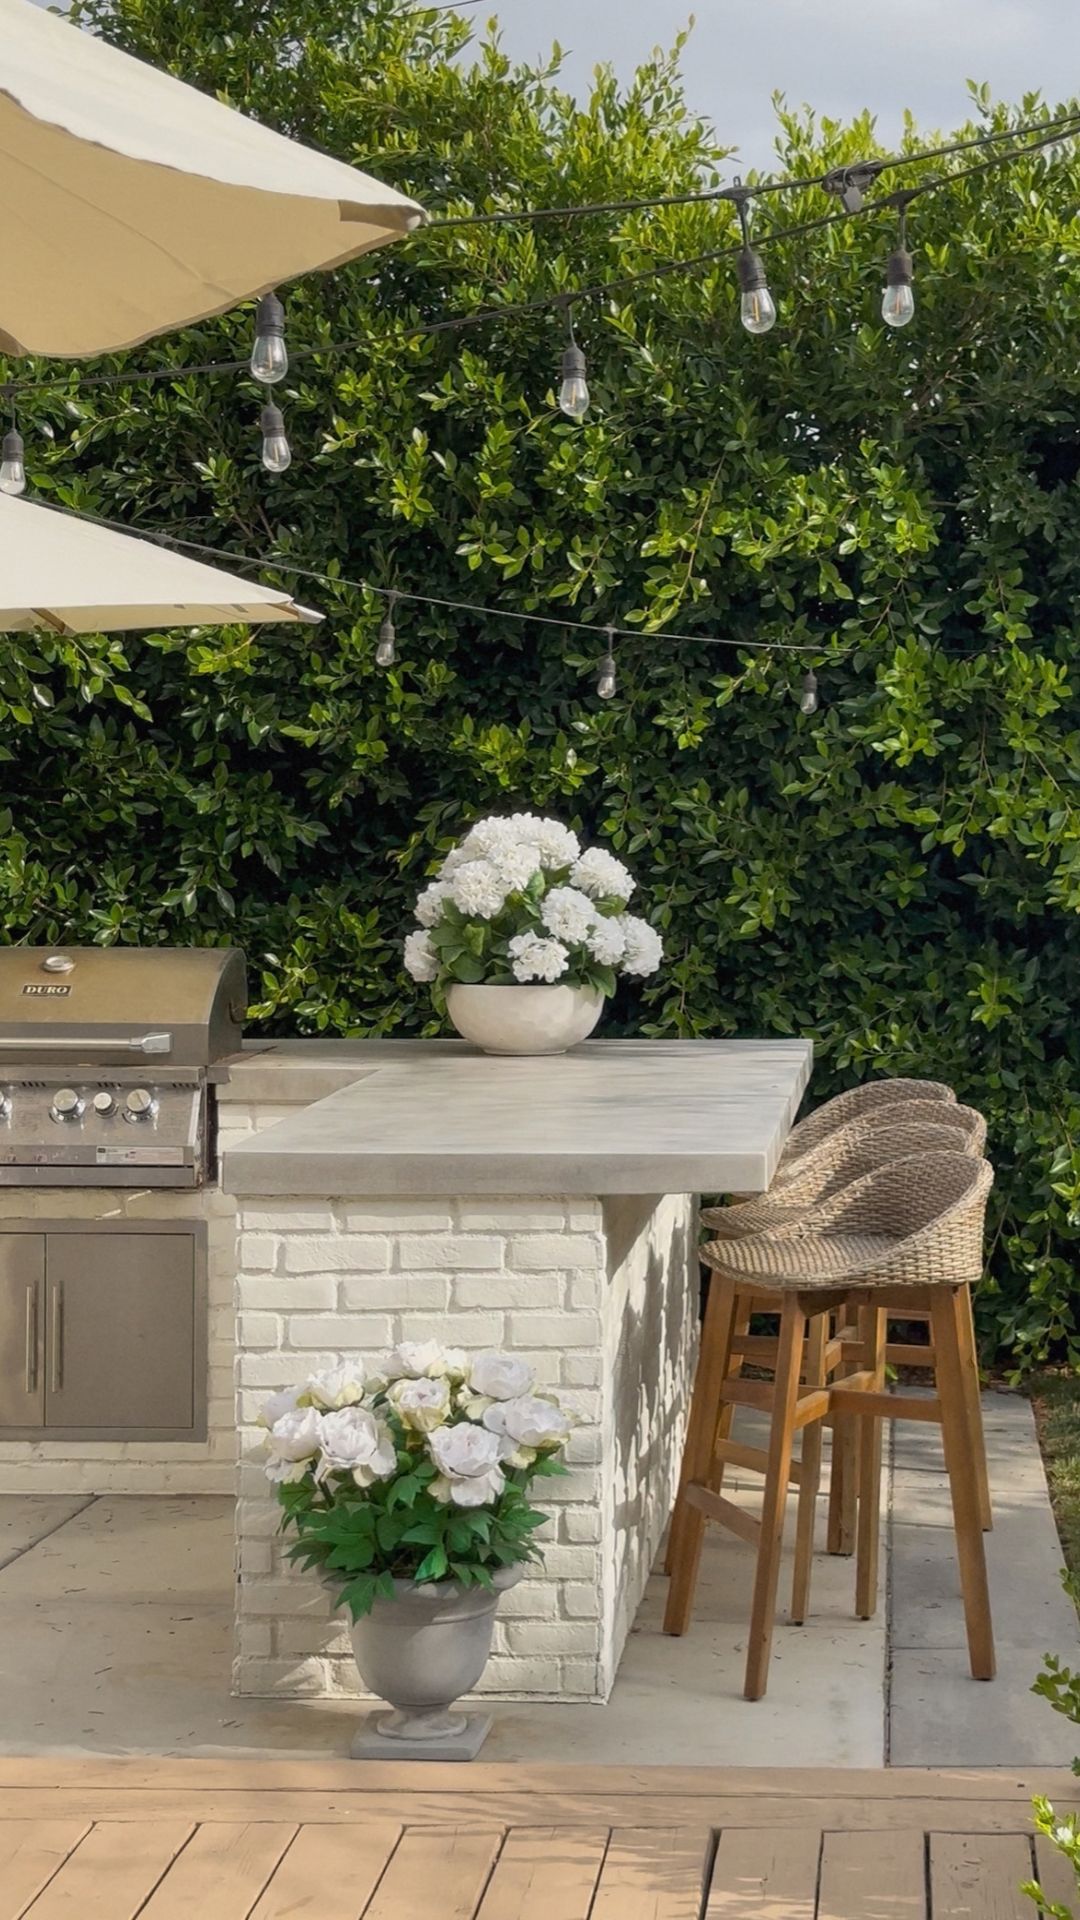
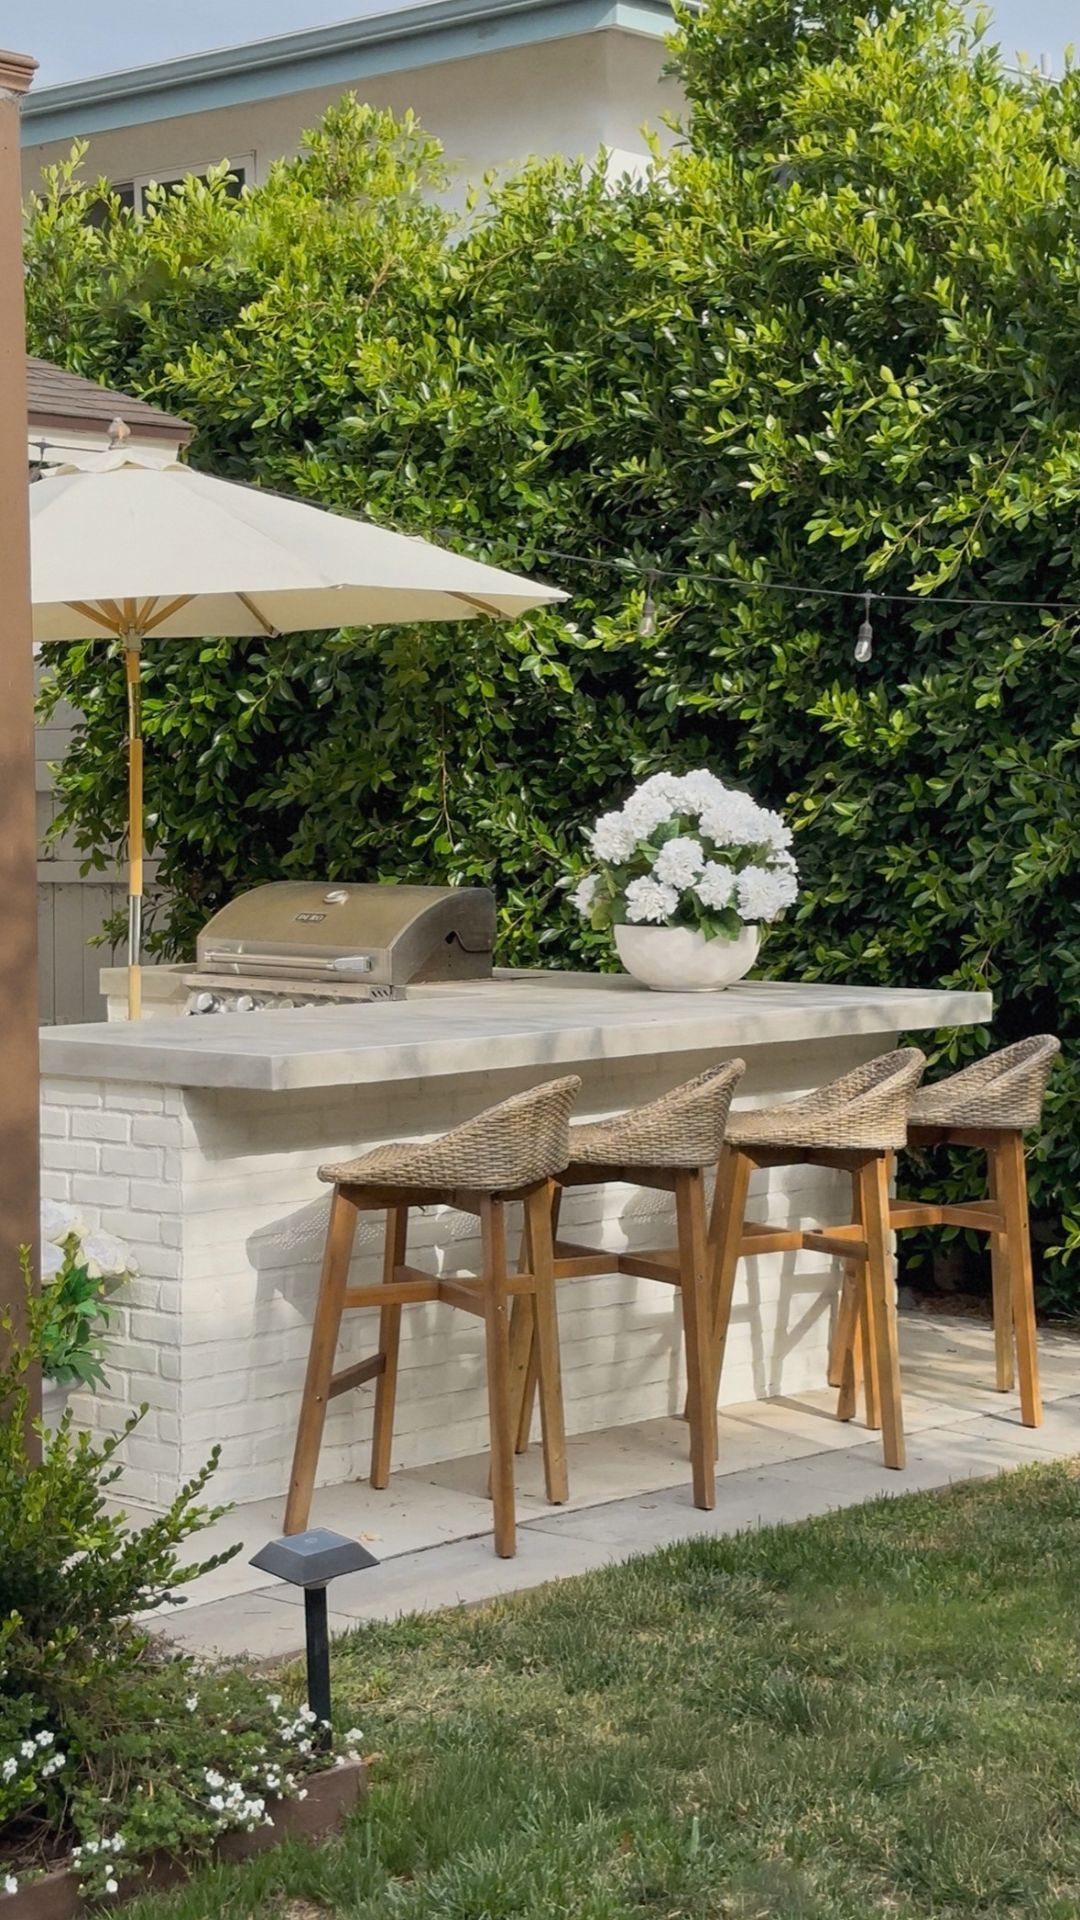
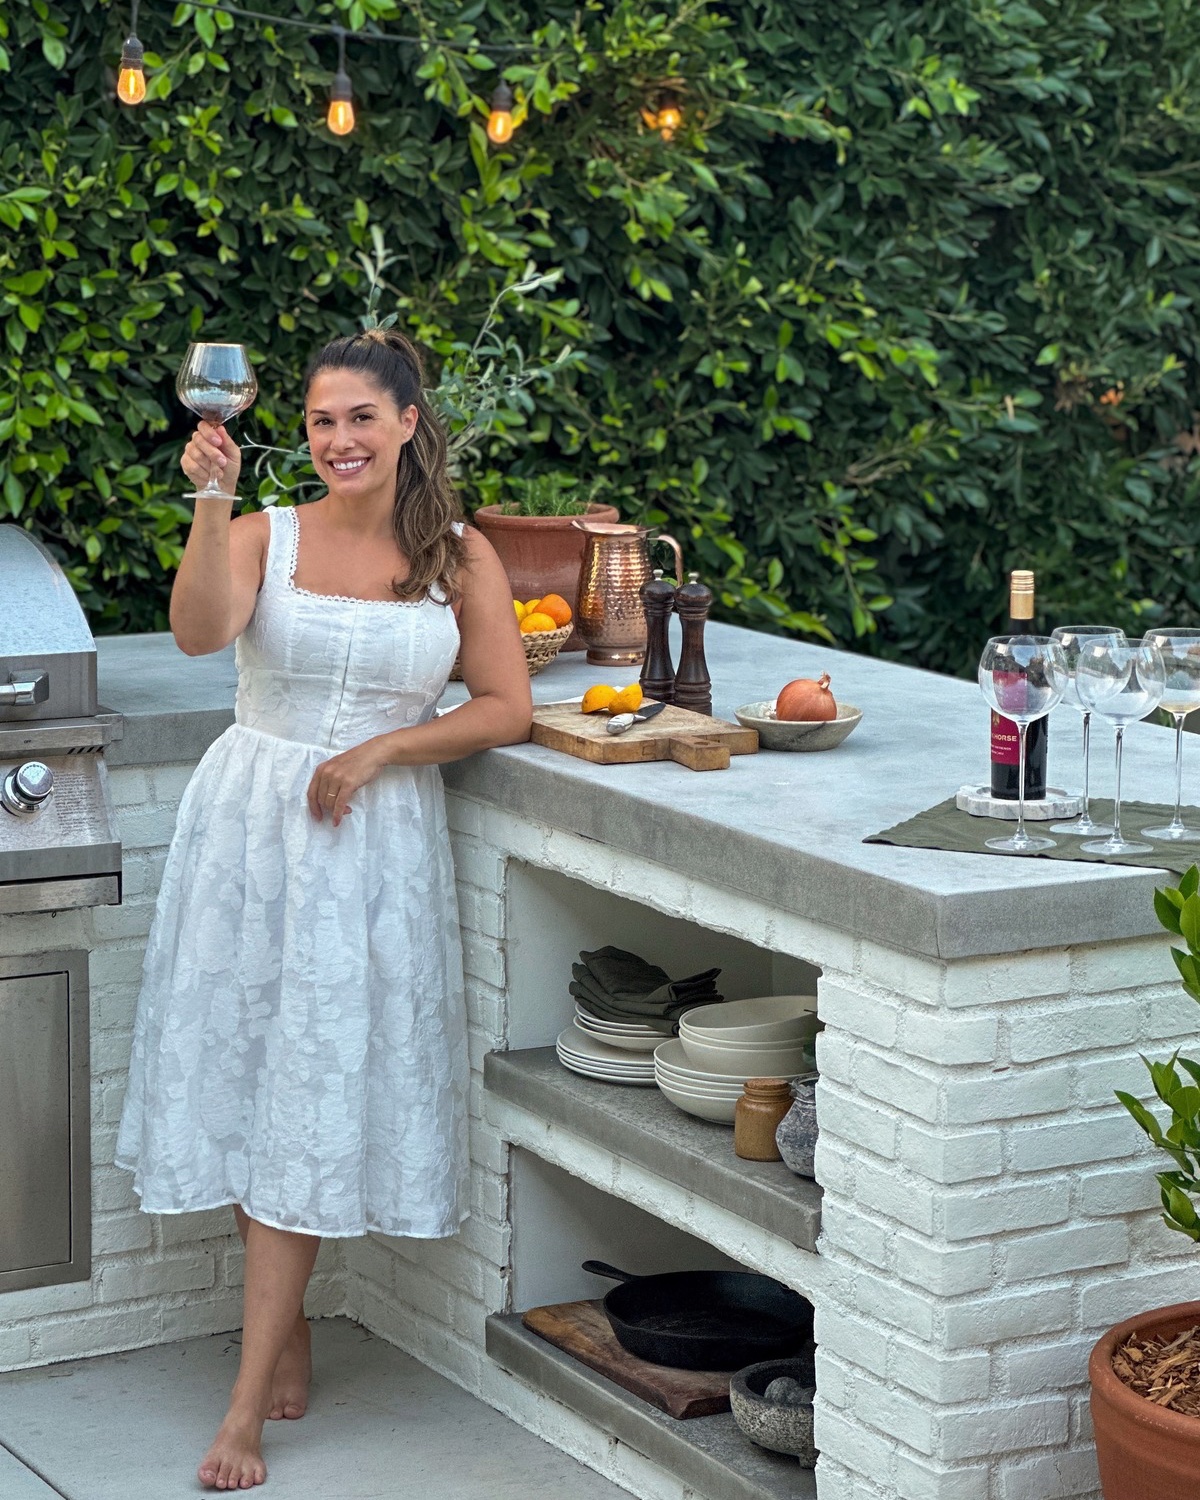
Of all the backyard projects, the outdoor kitchen and bar made the biggest architectural impact. What started in 2023 as a fairly simple plan for a concrete slab and freestanding grill evolved into something much more substantial in 2024: a permanent gathering place with a built-in grill, concrete countertops, white brick, storage, and seating for four.
I loved the look of white brick paired with concrete. It feels classic and grounded, especially against all the greenery, and it has that effortless California-meets-Montecito quality I was trying to achieve. The outdoor kitchen also helps anchor the yard, giving it a feature that feels like a natural extension of the house.
How Our Original Plans Changed
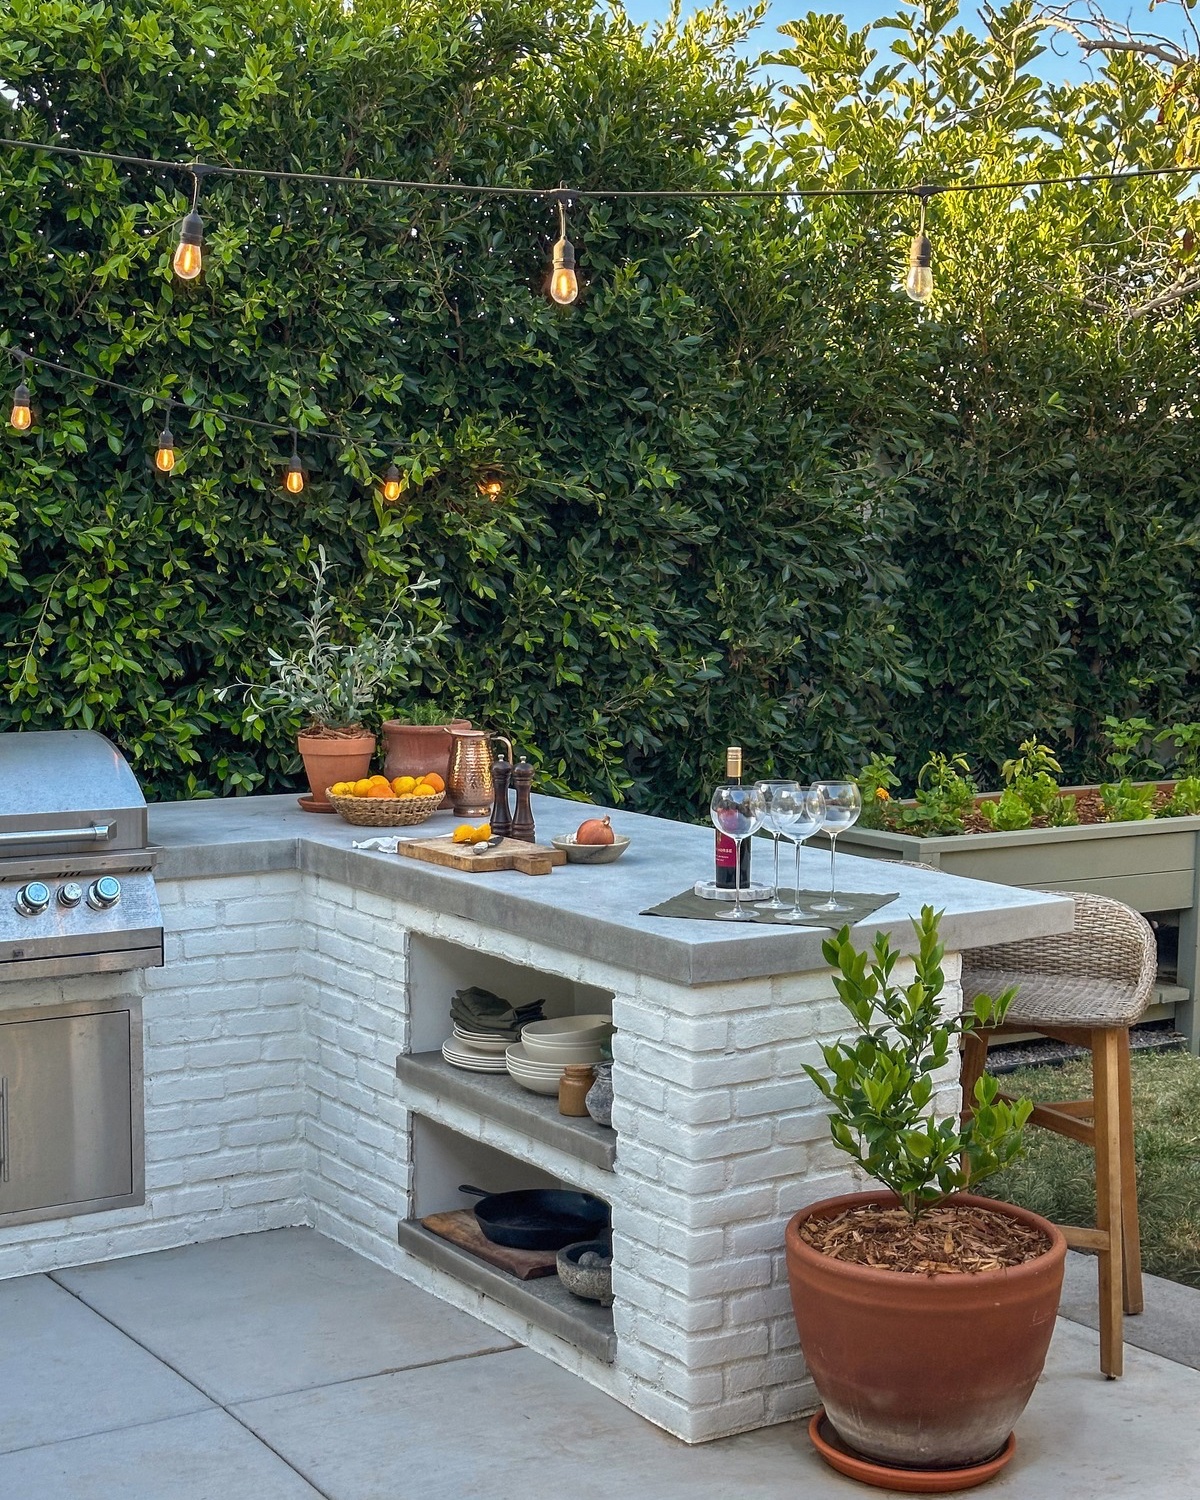
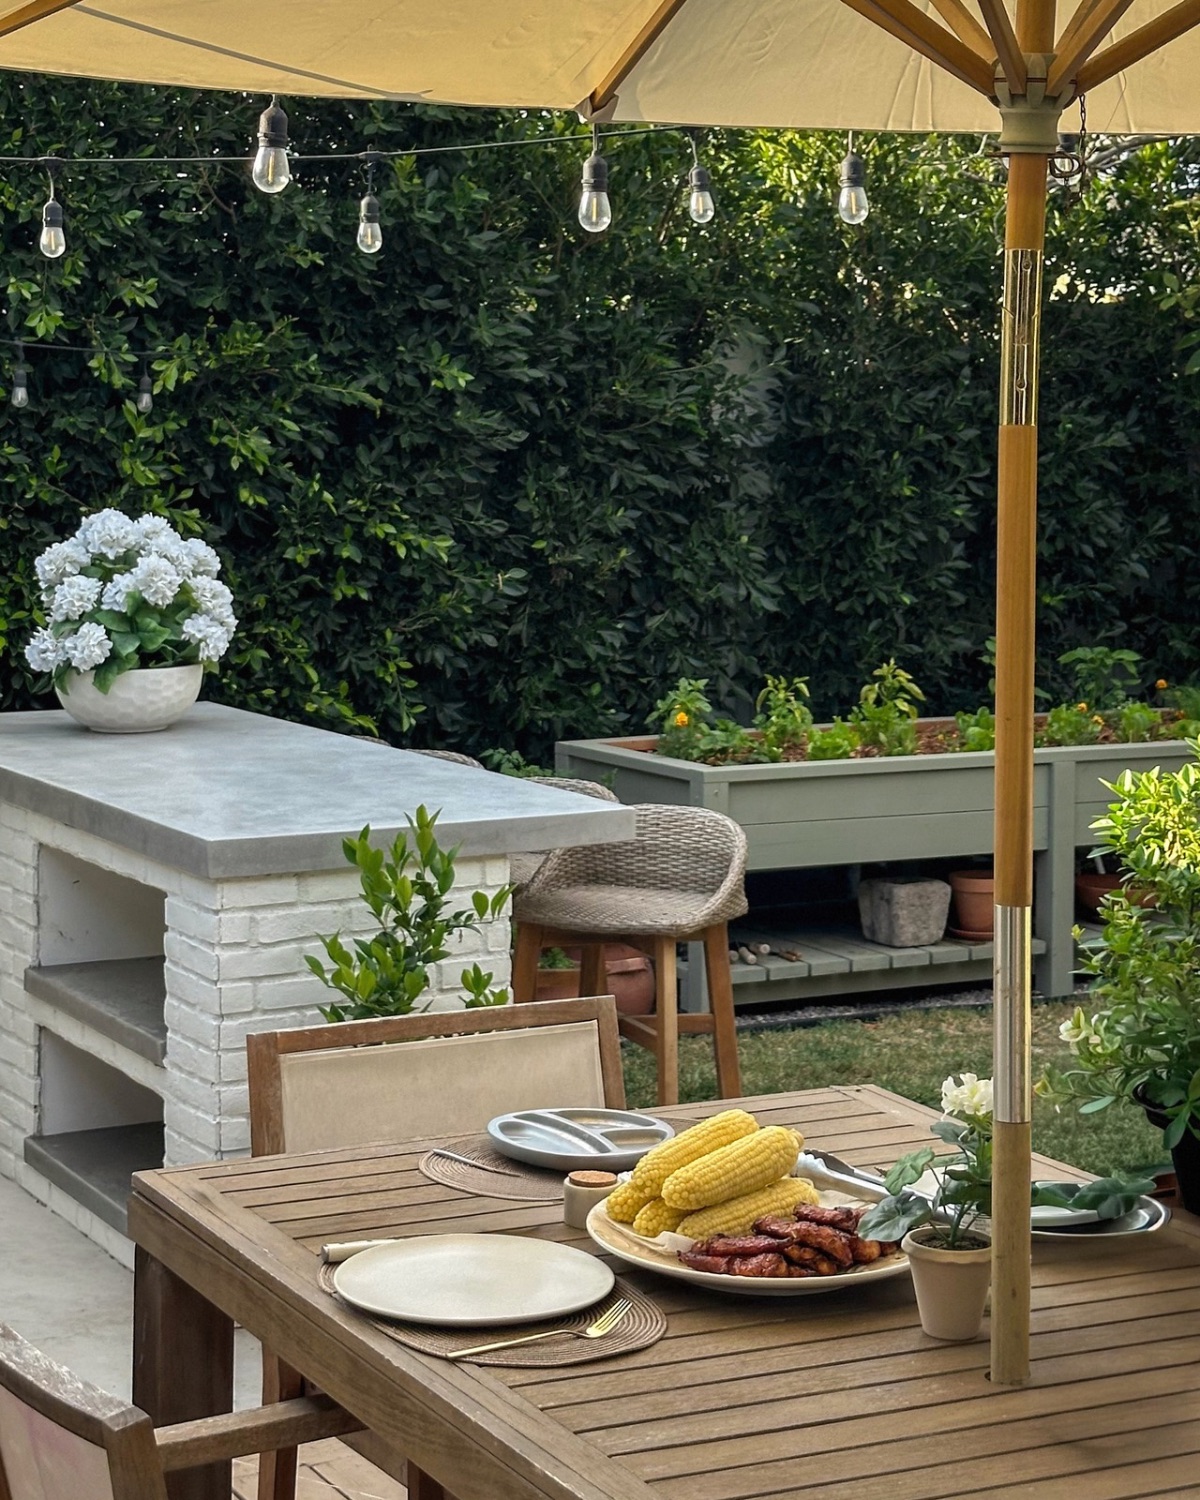
I had drawn the outdoor kitchen in my original design software, but as we worked through the actual build, Ryan’s dad helped us adjust the plan. We shortened part of the structure to preserve room for the future privacy hedge and added open shelving for extra storage. Ryan built the shelves, and I love having a spot for serving dishes and other things we use when entertaining, even if the spiders seem to love it, too.
The grill section needed non-combustible materials, so we framed it in metal. I’m going to be honest, it took forever. After almost two weeks of working on it on and off, we finally finished the framing. Ryan said if he were to do it all over again, he’d actually hire this part out because it was so complicated. We hired professionals to pour the concrete slab and to make the countertops, and I’m glad we did.
We initially considered quartzite countertops, but after looking at the cost of the slabs plus fabrication and installation, we decided on concrete instead. We didn’t feel confident enough in our skills, or have the time, to take on concrete countertops ourselves. The contractors built forms, added internal support, and poured the concrete. The polishing alone took about eight hours! It’s definitely not a step you want to skip, because that’s what gives them their smooth, satin finish. Start to finish, the countertops took about four days.
Adding the White Brick and Bar Seating
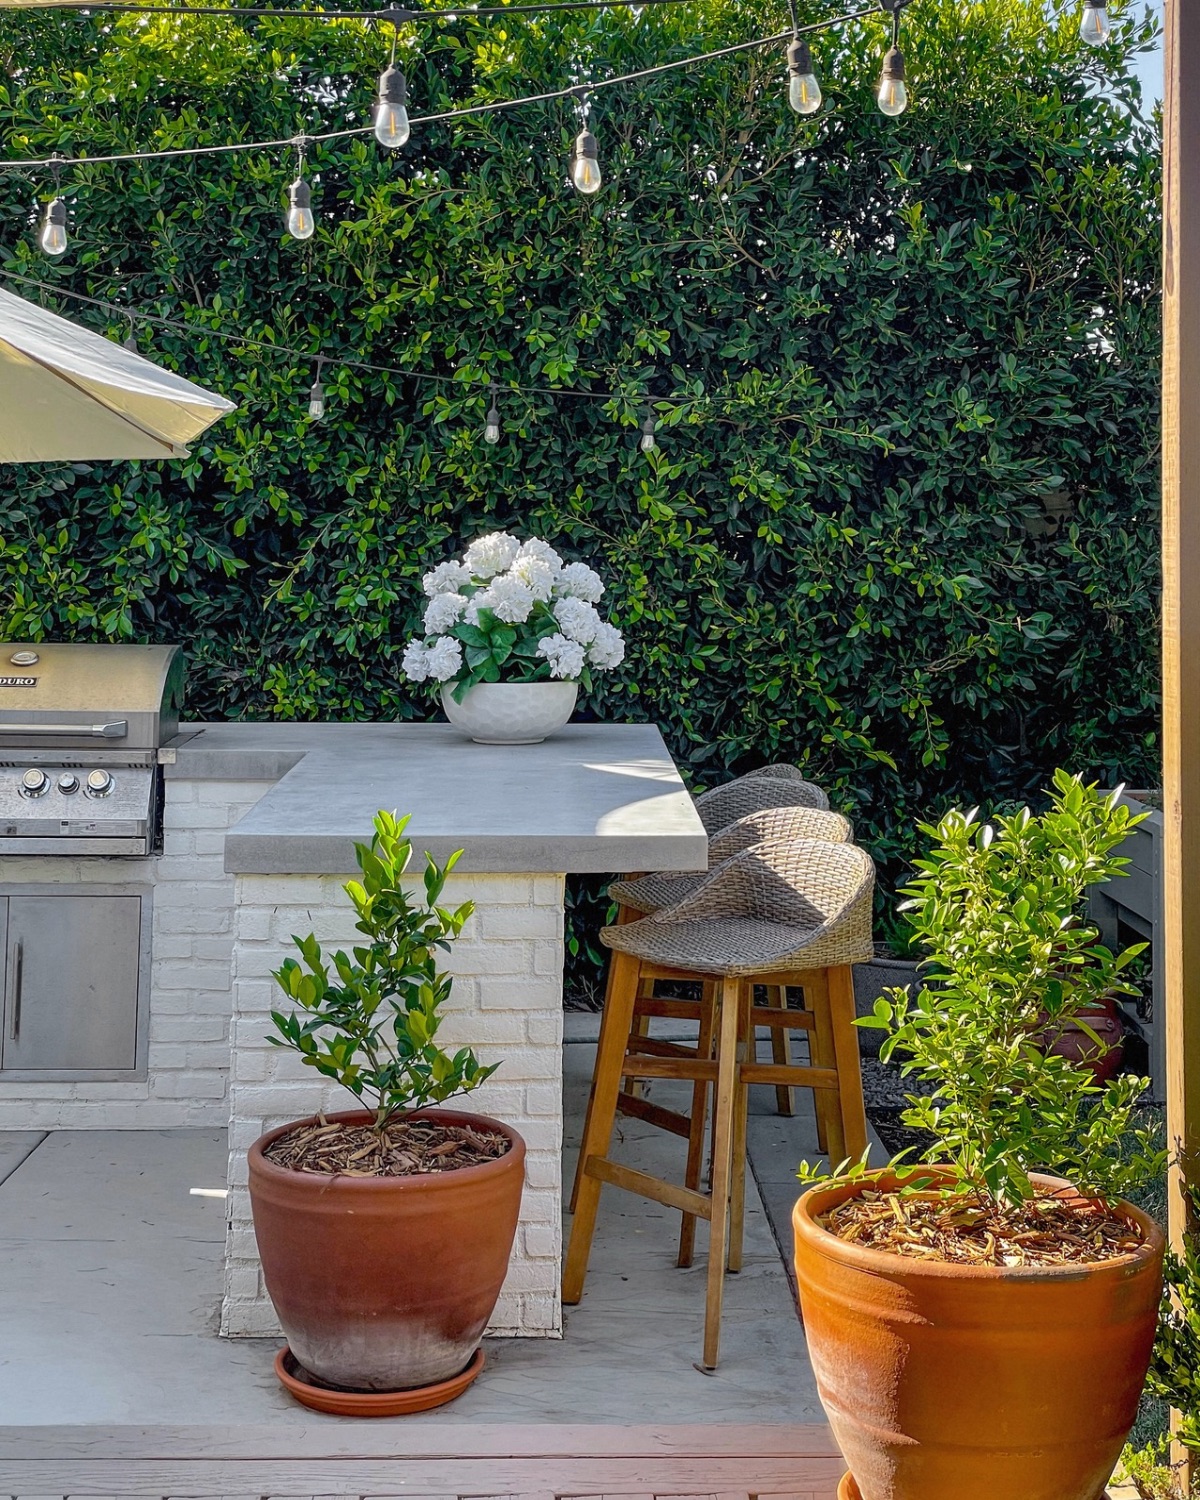
I found a brick veneer I liked, but it wasn’t the color I wanted. It was in stock, though, so I figured I’d just paint it! We could’ve installed the brick ourselves, but this was such a busy season that we decided the time saved was worth paying for installation and grout work.
Afterward, I painted everything with Behr Marquee exterior paint in Swiss Coffee, flat finish. One thing I learned: you really want a high-density roller designed for rough surfaces like brick and stucco. I also figured out a little trick for getting paint into the grout lines: stamp the roller into them, then use a brush to stipple paint into the deeper grooves. It takes a bit more time, but it helps get that consistent finish.
One of our more memorable design adjustments happened when we realized the original concrete slab didn’t leave enough room for stools at the bar. We extended the seating area with concrete pavers from Home Depot. They aren’t an exact match for the existing slab, but I actually like how they relate to the concrete countertop. It looks like an intentional border.
Our built-in grill is a four-burner NXR grill with a rotisserie from Home Depot, with a propane access door below it, and the woven bar stools are a set of four from Wayfair. I spent a long time looking for stools that had the right shape without a huge price tag, and these were a great find.
Planting Our Privacy Hedges
Our neighbors have two-story houses with windows overlooking the backyard, so privacy was always one of our biggest design goals. I wanted a natural, green backdrop rather than adding more hardscaping, and the hedge has become one of my favorite features in the entire space.
We planted approximately 40 Indian laurels (Ficus nitida) around the fence line, mostly in 15-gallon sizes, with larger 24-inch box trees behind the outdoor kitchen for a little more immediate screening. They were planted roughly 36 inches apart, with a root barrier where needed to help protect the surrounding hardscape.
There was one small catch: by the time we committed to the hedges, we had already poured concrete all the way to the fence. So we had to jackhammer out about two feet of concrete to give the trees somewhere to grow. Definitely not the most efficient order of operations, but sometimes you don’t realize what a space needs until you see it taking shape.
Ryan and I planted about six trees before we threw in the towel and hired real help. We had a baby, a million other projects, and roughly 40 trees to get into the ground! The crew finished the remaining planting in just a couple of hours, which made that decision feel pretty easy.
Watching these hedges grow has honestly been one of the most satisfying parts of the renovation. After the first year, the smaller trees were already covering roughly 60 to 70 percent of the fence height, and the larger ones had grown a couple of feet. Now the smaller trees are well over the fence, and the larger ones behind the barbecue are getting close to screening our neighbor’s second story. That lush green backdrop completely changed the look of the bar area.
Indian laurel can grow vigorously in Southern California, and its roots and potential invasiveness make it important to research whether it’s appropriate for your own area and planting location. For us, creating that continuous green backdrop has been one of the most rewarding changes.
Creating Ambiance with Outdoor Lighting
Lighting was one of those finishing touches that instantly made the space feel like somewhere you wanted to stay after sunset. I love a warm, subtle glow in a backyard, and I wanted it to feel inviting without having to rely on bright overhead lights.
For the deck lighting, we installed three posts. We dug the holes about 12 by 12 inches and three feet deep, added rocks at the bottom, and used concrete to set the 4×4 posts. We used a large level and braced the posts with stakes while everything set.
We cut them down so the market lights would hang parallel across the deck, level with the trim of the house. I debated having the lights slope, but I’m so glad I went with this instead! I stained the posts with Behr solid exterior wood stain and sealer in Tugboat, added post caps for a more finished look, and hung three strands of 48-foot market string lights from Home Depot in a zigzag pattern.
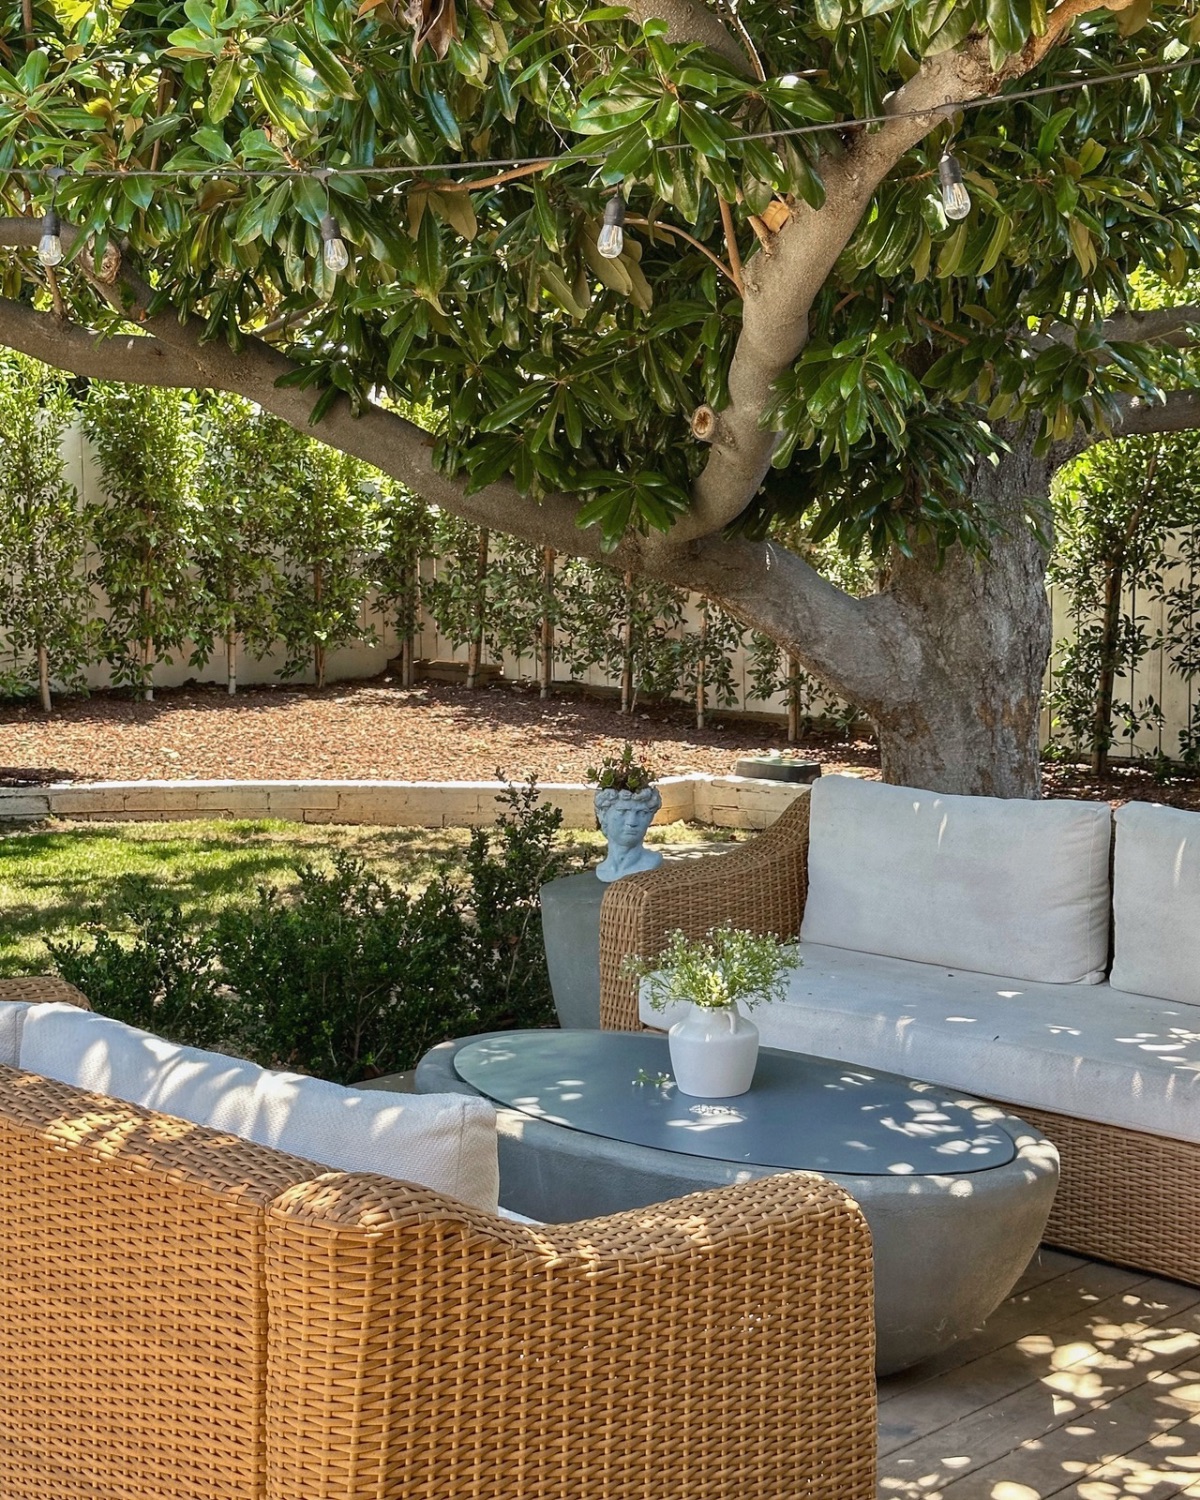
We also hung twinkle lights in the magnolia over the seating area. Between the lights, the trees, and the softer planting, the backyard has a completely different feeling at night. It’s one of my favorite examples of a relatively small detail changing how a space is actually experienced.
Our Outdoor Living and Entertaining Spaces
Once the bigger projects were in place, choosing furniture was all about making each area feel comfortable and genuinely usable. We spend a lot of time outside in Southern California, and we have friends and family over regularly. I wanted pieces that felt beautiful enough for a dinner party but practical enough for everyday life.
Our Outdoor Lounge and Fire Pit
The couches are some of my favorite pieces of outdoor furniture. They’re from World Market, and I have checked so many times because they rarely seem to come back in stock, so if you happen to see them available, I definitely recommend grabbing them. If they’re sold out, this lookalike sofa is a great alternative. One thing I particularly love is how extra long and deep they are compared with most outdoor couches. The wicker looks high-end, and having one long bench cushion rather than a bunch of individual cushions makes them look so much more expensive than they were. With light-colored cushions like ours, I definitely recommend fabric protection and furniture covers.
Our fire pit is from Wayfair, and we have the larger of the two sizes. I also bought the coordinating lid so it can double as a coffee table, but the lid originally came in black. I didn’t love that, because it cheapened the look in my opinion, so I spray-painted it to match the fire pit. Such a simple change, and now it looks like one cohesive piece. We also use a propane tank cover that doubles as a side table.
Our umbrella frames are from World Market, and the replacement canopies are from Amazon. I recommend swapping out light-colored canopies every few years as needed. When I replaced ours, it gave the entire backyard such a fresh look.
Our Outdoor Dining Area
Our outdoor dining area is right off the back of the house on the deck, and we use it constantly. Some days we eat outside more than once. That’s another reason I wanted the deck level with our back doors: it makes carrying food and dishes in and out so much easier.
Our dining table and chairs sit right under the umbrella. I loved our original dining set when we first got it. It fit my vision, the size was great, and so was the price. But we don’t cover the table, because we live in Southern California and eat outside sometimes multiple times a day for a good portion of the year. After several years of wear and tear, the quality just hasn’t held up. We’re planning to build something more durable to replace it.
One thing I always recommend is investing in outdoor furniture covers. I got ours on Amazon, and my dad has been using the same covers for nine years, with his covers and furniture still in great condition! They really do help keep cushions from getting stained and worn out unnecessarily.
All of these small details, the mix of wicker and wood, creamy umbrellas, terracotta pots in large and medium sizes, fresh flowers, and layered lighting, are what make the backyard feel collected rather than decorated all at once. If you’re interested in hosting, I also have a backyard engagement party post and a guide on how to set a table.
Our Raised Kitchen Garden
One of our newest additions has also become one of the most meaningful. In 2026, we turned a corner of the backyard into a raised garden bed and Martha Stewart-inspired kitchen garden where I could grow vegetables and herbs alongside my daughter. I’ve always loved the idea of a garden being part of the everyday rhythm of home: going outside to water, harvest a few ingredients, and see what’s grown since yesterday.
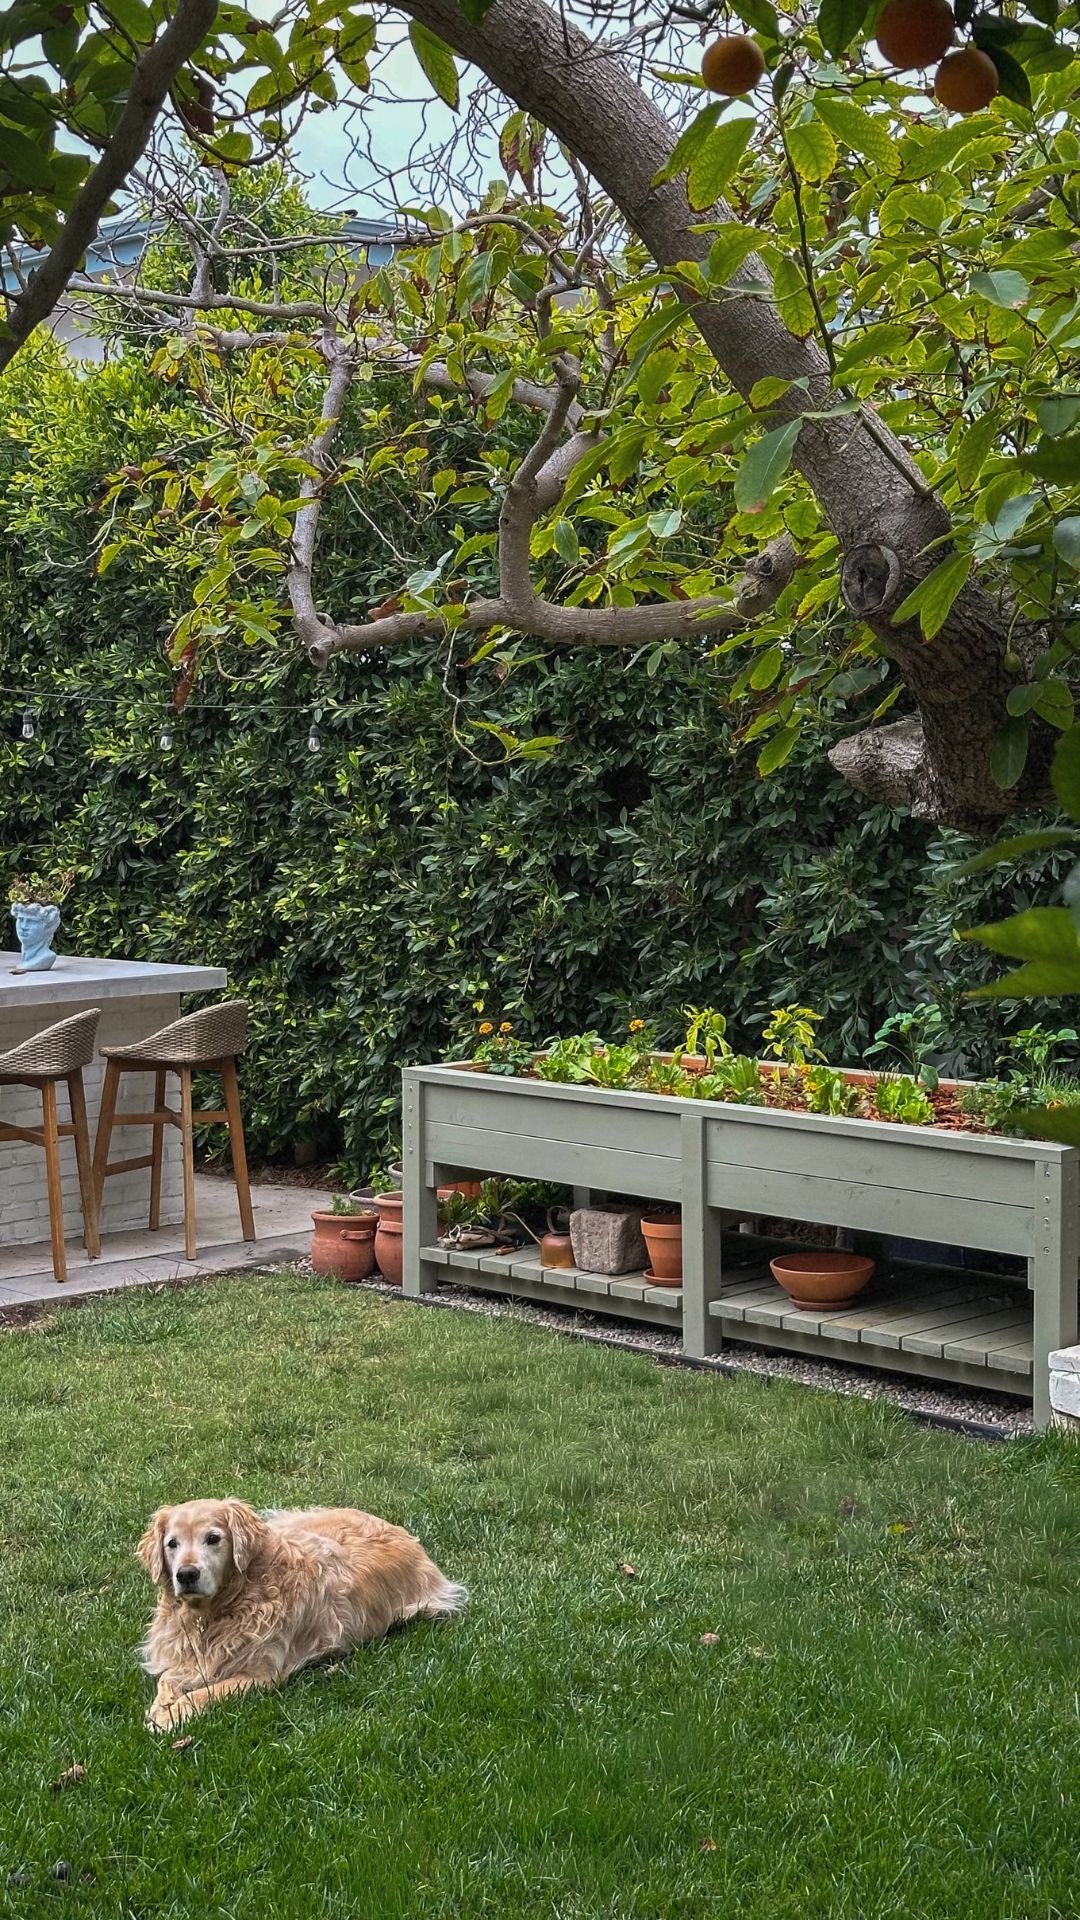
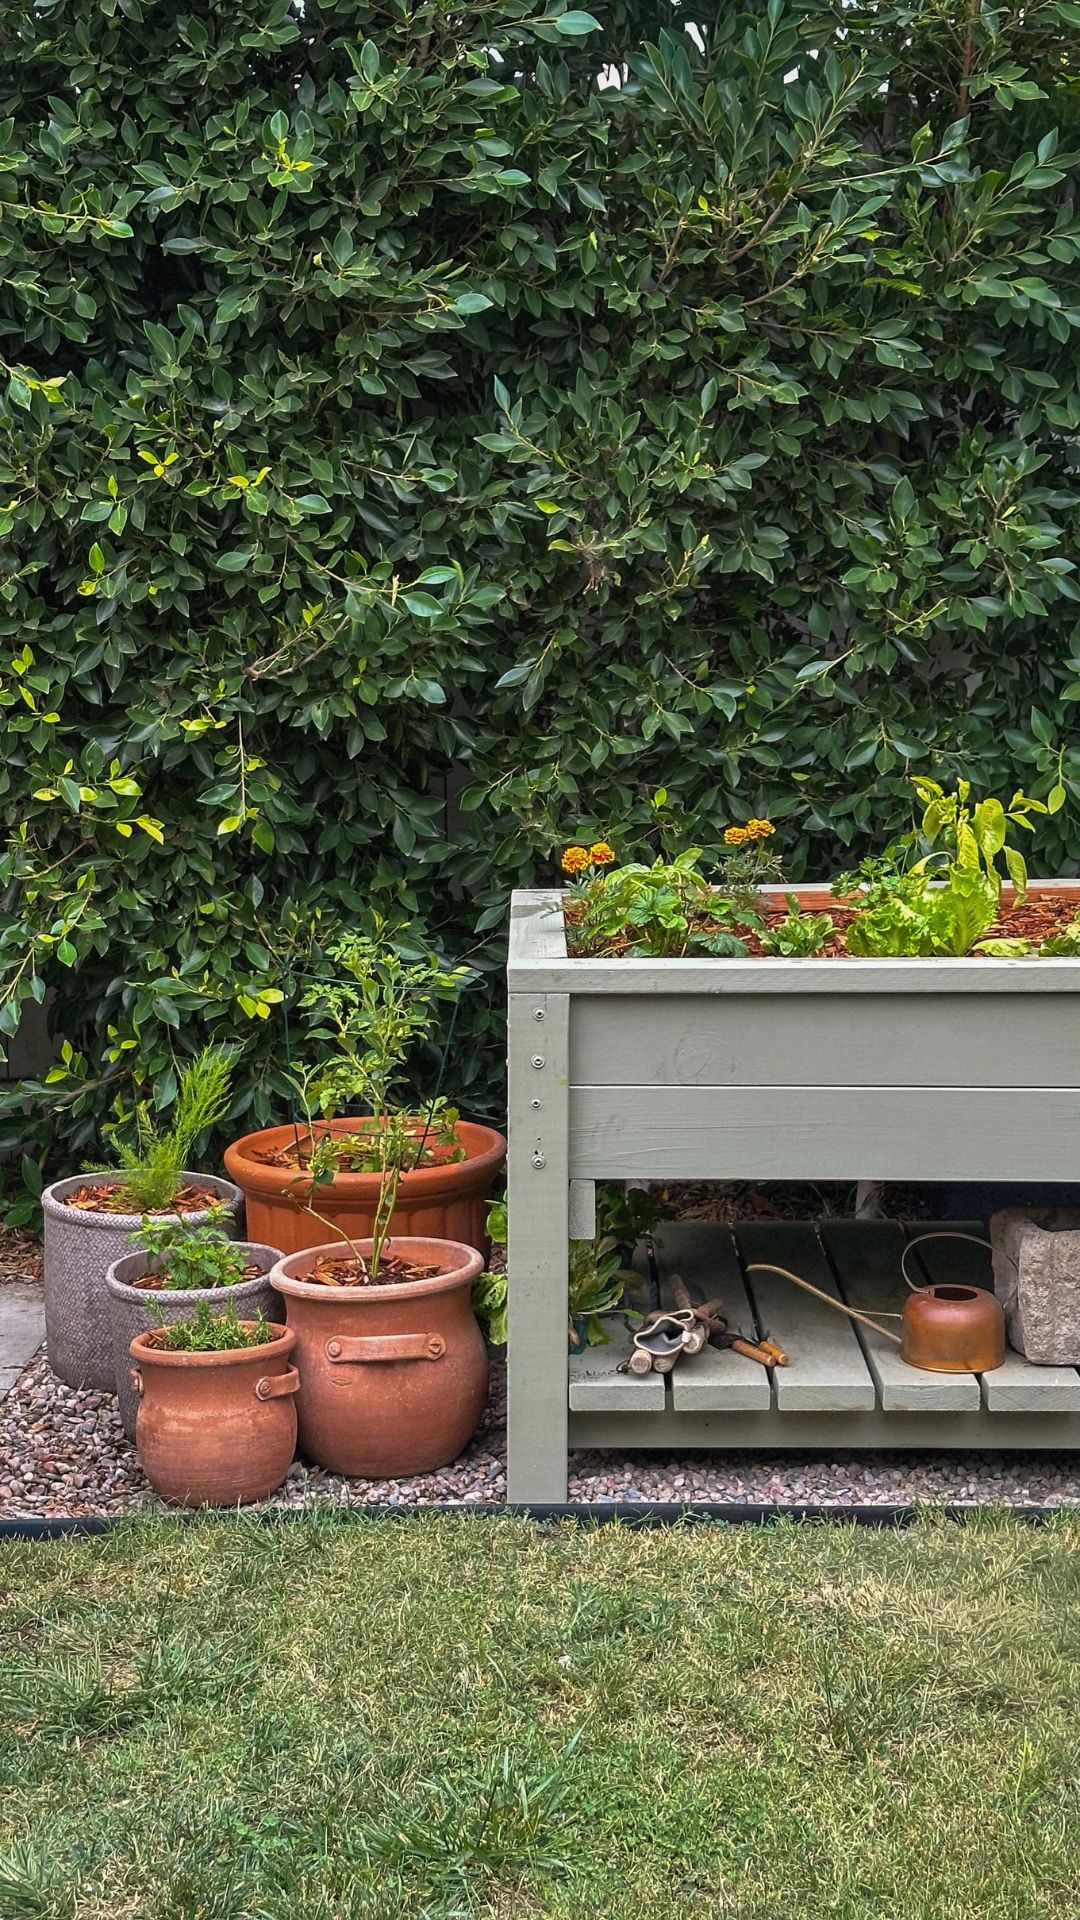
The garden bed had to be elevated because our two dogs love to dig and wreak havoc on just about anything I plant back here. Ryan built it from redwood 2x6s because it needed to support a lot of weight. It’s 9 by 3 feet, with about 10 inches of planting depth and a shelf underneath for pots, tools, and supplies.
I stained the exterior with Behr solid exterior stain and sealer in Muted Sage, which blends beautifully with the hedges behind it. We’ve used this product on numerous outdoor projects, but this one is specifically low VOC. VOCs, or volatile organic compounds, are the solvents that evaporate from paints and stains as they dry and create those strong fumes. A low-VOC formula releases far less of them, which mattered to me for something that sits right next to the food we grow and eat. We also only stained the exterior and left the interior raw redwood, so none of the stain touches the soil.
We also added a simple trim piece around the top, and it’s amazing how one small detail can make something feel so much more custom and intentional.
What We’re Growing
All of our starts were organic. In the garden bed, we planted strawberries, a large variety of herbs and lettuces, bell peppers, and lunchbox peppers. For anything that needed a little more space, or could get invasive, we planted in several large terracotta pots instead: cherry tomatoes, asparagus, rosemary, mint, and blueberries.
We added a lemon tree and a lime tree in terracotta pots, too, and planted an apple tree in the back garden bed between the orange trees. Our fruit trees now include avocado, orange, lemon, lime, and apple.
And then there’s the surprise. I recently noticed wild chili peppers growing right at the base of our avocado tree. I can only speculate how they got there. My assumption is that a bird dropped a seed at some point, but they’re thriving.
The garden brings such a pretty layer of life and color to the yard, and I love that it’s a place where the kids can learn alongside us.
How Much Did Our Backyard Renovation Cost?
We didn’t start with one fixed budget or a plan to finish the entire backyard in a single season. Instead, we saved and paid for each phase as we were ready for it. The main renovation came to approximately $28,000 for materials and hired labor, not including outdoor furniture. Our newer raised kitchen garden was a separate project.
| Project | Cost |
|---|---|
| Landscaping and irrigation, including labor | $10,000 |
| BBQ and bar: materials, brick, countertops, labor | $8,500 |
| Walkway replacement and concrete slabs | $4,000 |
| Deck | $3,500 |
| New fence | $2,000 |
| Core renovation | $28,000 |
| Raised kitchen garden (2026) | $600 |
| Total | $28,600 |
That $28,000 covers the major elements that transformed the space, but it doesn’t mean we hired someone to do the entire renovation. We tackled most of the work ourselves, with help from Ryan’s dad, and hired professionals for the concrete slab, concrete countertops, brick veneer installation, and part of the hedge planting.
Doing it in stages gave us the freedom to make decisions as we went and pay in cash rather than borrowing to finish everything at once. It also meant we could invest where it mattered most and mix more affordable finds with long-term pieces. If you’re planning your own projects, I share more about that process in my home renovation budget guide.
What We’ve Changed Along the Way
If there’s one thing I’d tell someone planning a backyard renovation, it’s to think carefully about how you actually want to live in the space, and be willing to change course when real life tells you something different. We made several updates after our original decisions: shrinking the deck to create more room to play, replacing clover with fescue, expanding the concrete for bar seating, and removing a strip of brand-new concrete to plant our privacy hedges.
Would it have been easier to get every detail right on the first try? Absolutely. But I don’t look at those changes as failures. Our priorities shifted as we grew into a family with two young children, and of course the way we use our home changed along with them.
My Favorite Part of Our Backyard
This is a tough question because I genuinely love each part of the backyard for different reasons. If I had to choose one, it would be our outdoor kitchen and bar. It’s become such a beautiful architectural feature, and the mature privacy hedge behind it gives that whole corner the elevated, finished look I was hoping for.
A very close second is the raised kitchen garden. It may be a smaller project in comparison, but tending to it has become part of our daily routine, and I love the extra color and life it brings into the yard.
What’s Next for Our Backyard?
The next project I’m dreaming about is a dedicated play area under the magnolia, complete with a custom playset for the kids. We also want to make a new outdoor dining table that can better withstand how often we use it. And knowing me, there will probably always be another plant to add or another little corner I want to improve.
When I look at the before photos now, I see more than a backyard renovation. I see our family’s last five years: projects squeezed in around pregnancies and house renovations, and now our kids running around the very spaces we built for them.
I’m glad we didn’t hold out for the perfect budget or a stretch of free time to do it all at once. We would have missed so many ordinary, lovely moments outside. Our backyard was never meant to be perfectly finished. It’s ours, and it’s full of the life we get to live in it.
Shop the Backyard
Frequently Asked Questions About Our Backyard Renovation
How much did your backyard renovation cost?
The core renovation cost approximately $28,000 in materials and hired labor. Our raised kitchen garden added roughly $600, bringing the total for those projects to approximately $28,600, excluding furniture.
How long did the renovation take?
We bought our home in fall 2021, began work on the backyard in winter 2022 to 2023, completed most major projects in 2023 and 2024, and added the kitchen garden in 2026. It’s still a work in progress.
Did you do the renovation yourselves?
We designed and completed most projects ourselves, with help from Ryan’s dad. We hired professionals for the main concrete work, the concrete countertops, brick veneer installation, and planting many of the privacy hedge trees.
What paint and stain colors did you use?
The fence and retaining wall were finished in Behr Picket Fence White (using the appropriate products for wood and masonry), the deck is Behr Sandal, the market-light posts are Behr Tugboat, and the outdoor kitchen brick is Behr Swiss Coffee.
What did you use for privacy in the backyard?
We planted Indian laurel trees along the fence line, using mostly 15-gallon plants with larger trees behind the barbecue. Research local suitability, growth habits, and root-management requirements before planting this variety.
Would you recommend a clover lawn?
Yes, especially in areas with lighter foot traffic. We loved ours, but switched to fescue sod as we needed a more durable lawn for the kids and dogs and wanted a consistent look in our front and backyard.