
Hosting & Gatherings
How to Set a Table: A Simple Table Setting Guide
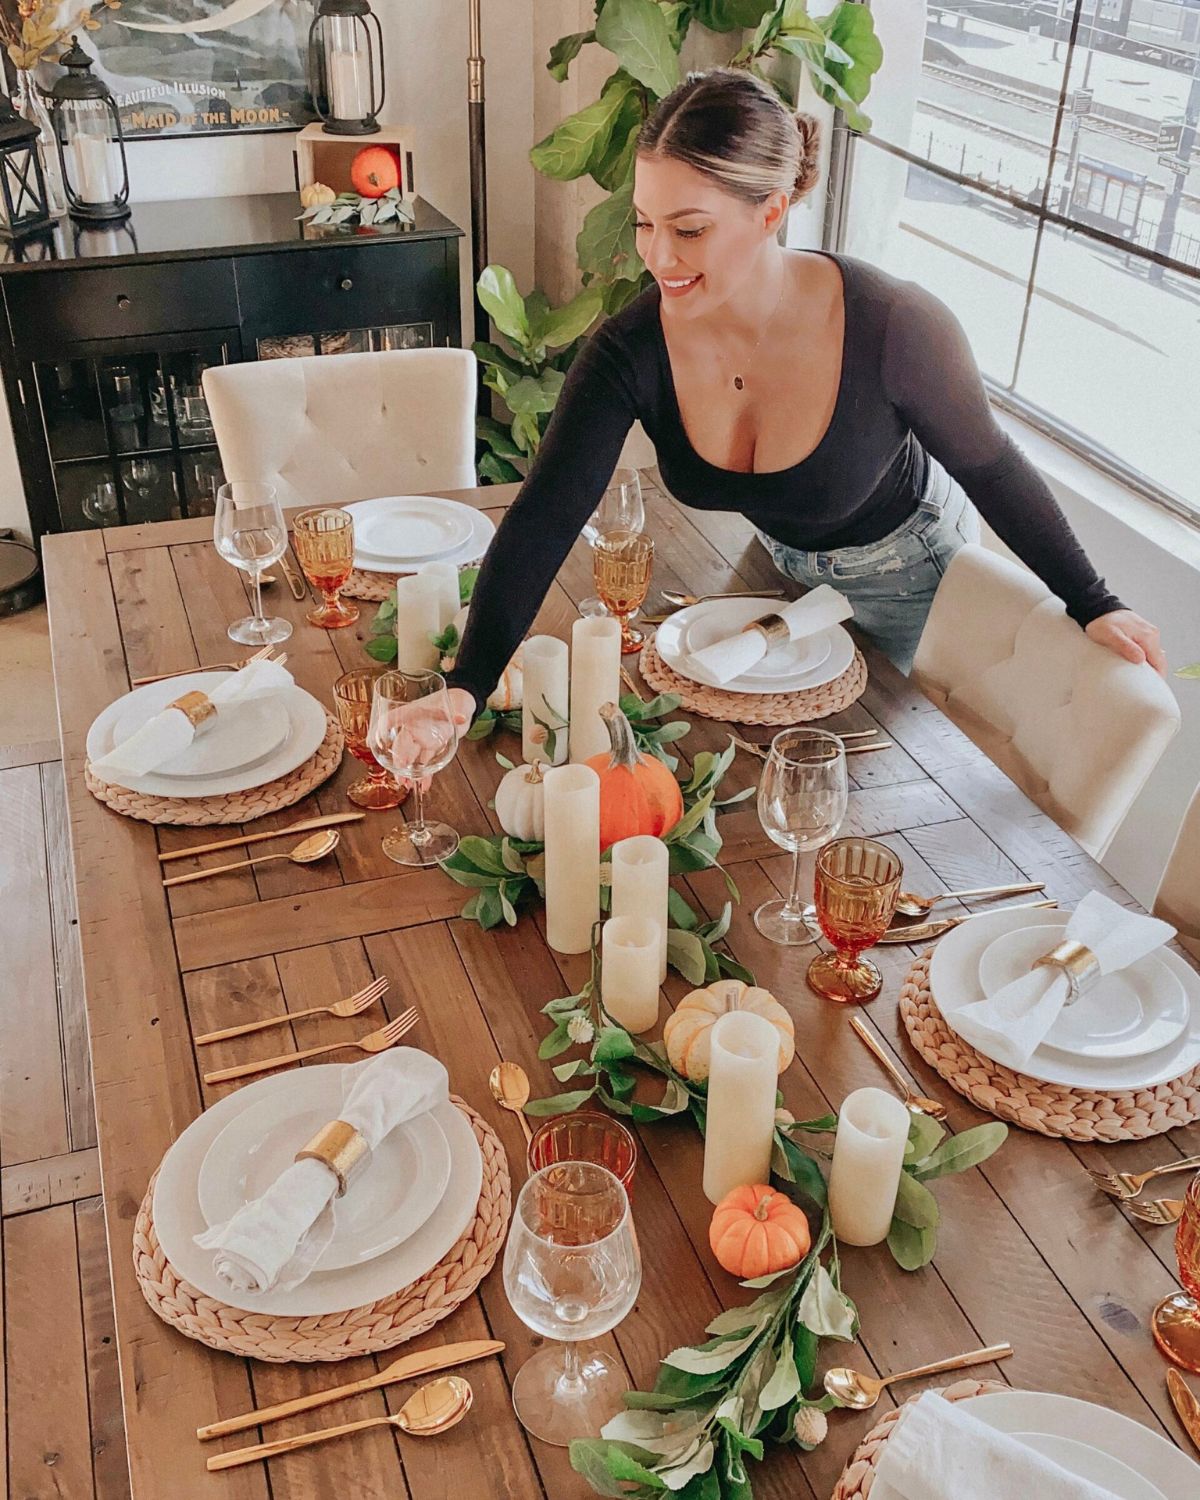
The Quick Answer
To set a table, start with a charger or placemat, then center the dinner plate on top. Place the fork to the left, and the knife (blade facing in) and spoon to the right. Set the napkin on the plate and the glass above the knife. That order works for every table.
I remember the first time I really noticed a beautifully set table. I was twelve, watching The Princess Diaries — the scene where Mia is being walked through her etiquette training — and I was completely taken with it. I grew up in an ordinary middle-class house in the suburbs, where dinner meant plastic cups and paper napkins. Nothing fancy. Learning how to set a table felt like something that belonged to other people.
It doesn’t. A table that looks like it belongs in a nice restaurant is not about money or a twelve-piece china set — it comes down to understanding one simple formula and repeating it. Once it clicks, you can set a beautiful table in about five minutes, whether it’s a regular Tuesday or you’re hosting twelve people for the holidays. This is the guide I wish I’d had at twelve: what goes where, what every piece is for, and how to make any table feel gathered and intentional.
What do you need to set a table?
Before you arrange anything, gather your pieces. A place setting — the cluster of items in front of one person — uses a short, repeatable list. You don’t need every item for every meal; the everyday version uses about half of it, and a full formal setting simply adds the rest.
For one complete place setting you’ll want a charger or placemat (the layer that anchors the setting and protects the table), a dinner plate, and a salad plate or bowl for the smaller course. Then a napkin, your flatware — a dinner fork, knife, and spoon at minimum — and a water glass. Add a wine glass if you’re pouring wine, and a napkin ring if you have one; it makes the whole setting look intentional in about three seconds.
If you’re just starting to build a set, buy flatware and dinnerware in simple, timeless shapes. Trend-driven sets date quickly; a clean white plate and a classic flatware pattern will still look right in ten years. According to the Emily Post Institute, even a relaxed table follows the same underlying logic — so the pieces you choose now will carry you from weeknight dinners straight through to the holidays.
How do you set a table step by step?
Here’s the formula. Set one complete place setting first, get it right, and then just repeat it at every seat. I work in this exact order every time — it builds from the bottom layer up, so nothing gets bumped out of place.
-
Start with the charger or placemat
Lay down your charger plate or placemat first. This is the base that everything else sits on, and it visually frames each seat.
-
Center the dinner plate
Place the dinner plate in the middle of the charger. This is the anchor of the whole setting — everything else is positioned around it.
-
Add the salad plate or bowl
Set the salad plate or salad bowl on top of the dinner plate, in the center. It comes off first when the meal starts, so it goes on last.
-
Place the napkin
If you’re using a napkin ring, slip one corner of the napkin through the ring, pull it toward the middle, fluff it slightly, and rest it on top of the salad bowl. No ring? Fold the napkin simply and lay it on the plate or just to the left of the fork.
-
Set the flatware
Place the knife to the right of the plate with the blade facing in toward the plate. The spoon sits to the right of the knife. The fork goes on the left side of the plate.
-
Add the glass
Place the water glass in the top right corner of the setting, just above the knife. A wine glass, if you’re using one, sits to the right of the water glass.
That’s the whole formula. Once one setting looks right, the rest of the table is just muscle memory. Here’s a single finished setting up close — then the same thing fully labeled.
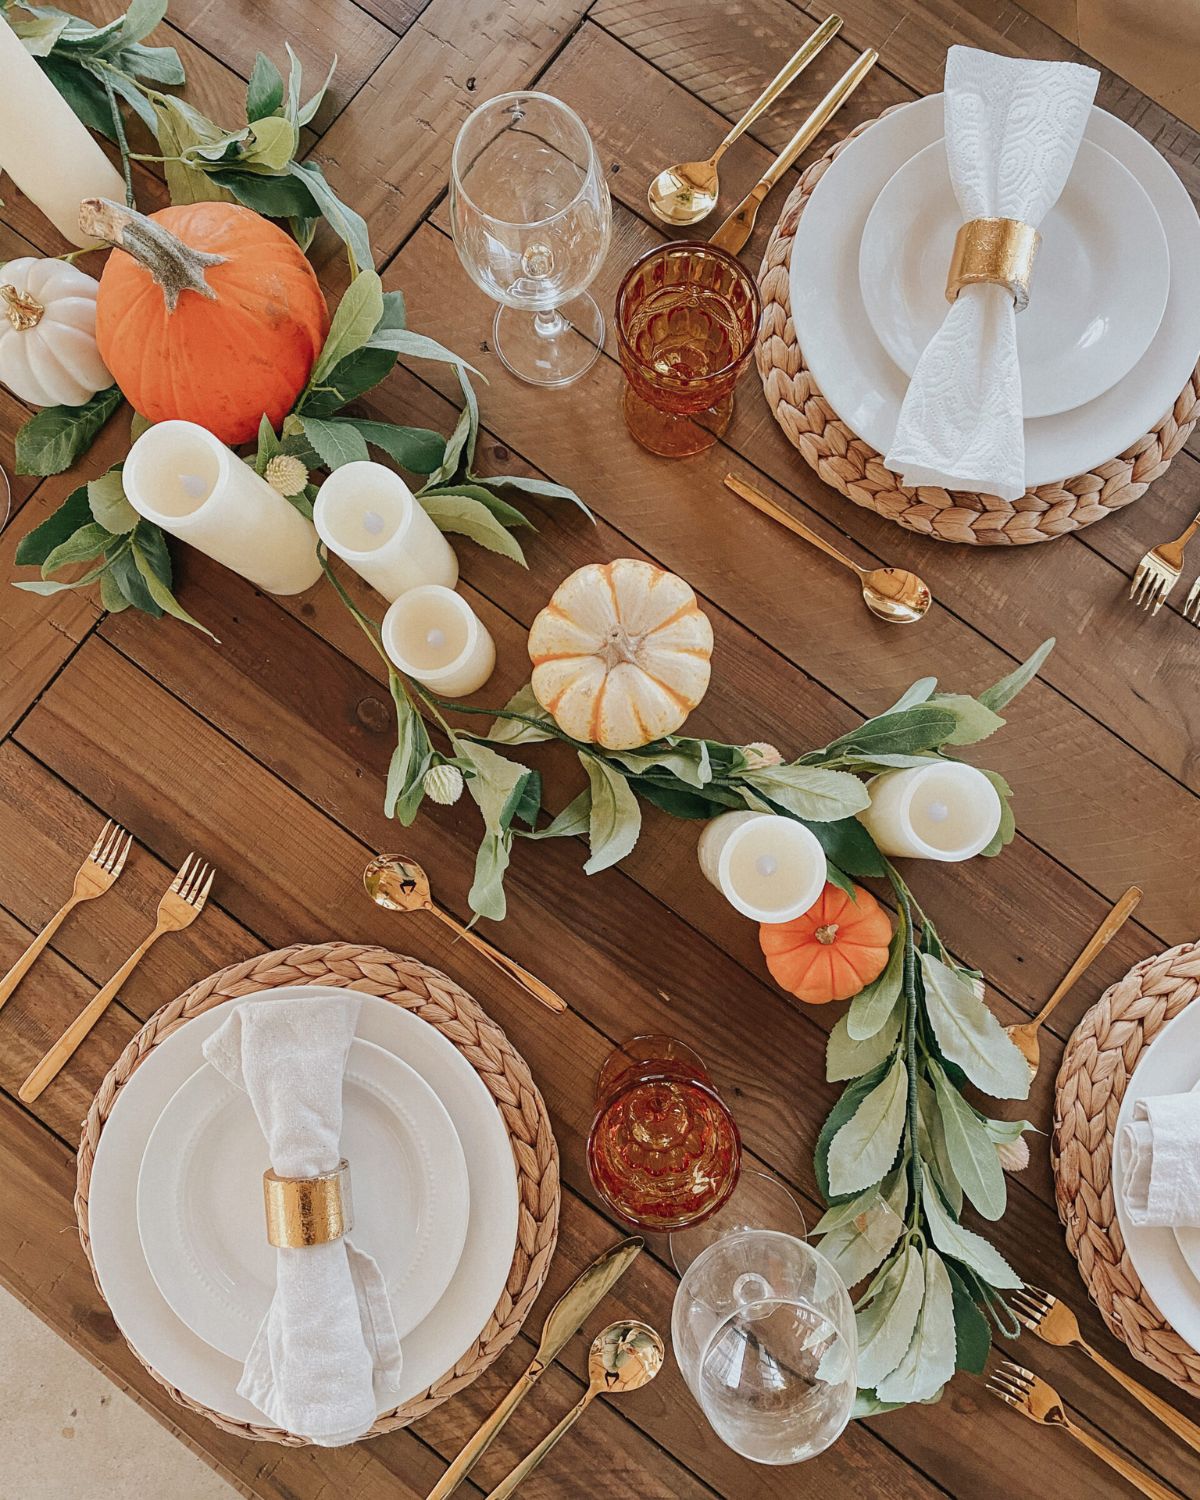
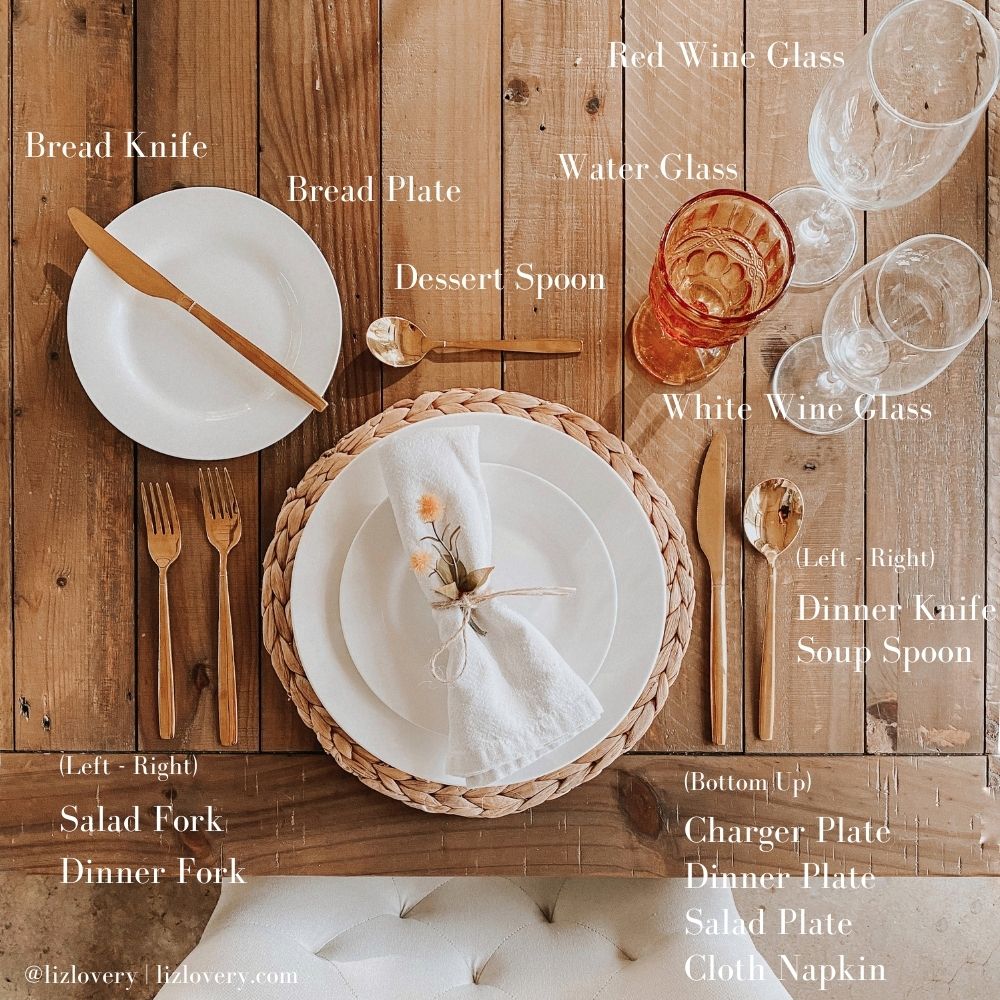
Table setting guide: every piece, explained
The diagram above shows a full formal setting. Here’s what each piece is, where it goes, and — just as useful — why. Once you know the reasoning, you never have to memorize a layout again.
- Charger plate
- A large, often decorative plate that sits beneath the dinner plate. It catches anything that spills off the dinner plate during the meal and frames the setting. A placemat does the same job.
- Dinner plate
- The main plate the entree is served on. It sits centered on top of the charger and anchors the whole setting.
- Salad plate
- Sits on top of the dinner plate, and is used for the salad. With a smaller dinner set, it doubles as the appetizer plate.
- Soup bowl Not pictured
- If you’re serving soup, the bowl sits on top of the salad plate, since soup is one of the first courses.
- Cloth napkin
- For a formal dinner, cloth or linen napkins are used over paper — though paper is perfectly fine if that’s what you have. Set it on top of the salad plate, tucked to the left of the fork, or through a napkin ring.
- Bread plate
- A small plate set at the top left of the charger. It’s a little smaller than the salad plate — and a salad plate fills in fine if you don’t own dedicated bread plates.
- Bread knife
- Rests on the bread plate at an angle, blade facing away from the plate. It’s kept separate so butter or spread doesn’t end up on the flatware you use for the main course.
- Salad fork
- The smaller of the two forks. It goes to the left of the dinner fork — on the outside — because salad is served before the main course, and flatware is used from the outside in.
- Dinner fork
- The larger fork, used for the main course. It sits just to the left of the dinner plate, inside the salad fork.
- Dinner knife
- Sits to the right of the dinner plate with the blade facing in, toward the plate.
- Soup spoon
- The larger of the two spoons. Because soup comes before the main course, it sits on the outside, to the right of the dinner knife.
- Dessert spoon
- The smaller spoon, set horizontally above the dinner plate with the bowl of the spoon facing left. Dessert is last, so it’s tucked up and out of the way of the other flatware.
- Water glass
- Sits at the top right of the dinner plate, closest to the plate — it’s the drink guests reach for most throughout the meal.
- Red wine glass
- Typically the largest glass, set to the right of and slightly above the water glass.
- White wine glass
- The smaller of the two wine glasses, set just below the red wine glass and to the right of the water glass. It’s common to set both so guests can choose.
Which side do the fork and knife go on?
This is the question that trips everyone up, so here’s the simple way to remember it: fork on the left, knife and spoon on the right.
A trick that has never failed me — fork and left both have four letters; knife, spoon, and right all have five. So the four-letter word goes with the four-letter side. The knife always faces in, with the blade pointed toward the plate — partly etiquette, partly just safer and tidier looking.
When there’s more than one fork or spoon, they’re placed in the order you’ll use them, working from the outside in. The salad fork sits outside the dinner fork because salad comes first; the soup spoon sits outside the dinner knife for the same reason. If you’re ever unsure at someone else’s table, just start from the outside and work your way in — that’s the quiet reason the whole formula exists.
What is the proper order for a table setting?
A table setting isn’t random — it’s a map of the meal. Once you see how the courses drive the layout, the placement of every fork and spoon stops being something to memorize. Here’s how a typical four-course dinner plays out, and how the setting follows it.
Appetizers come first. A smaller plate — like a bread plate — is good to have ready. If you don’t have a large dinner set, guests can use the salad plate for an appetizer, and the bread plate can stay in play through the main course.
Soup or salad is next. The salad plate sits on top of the dinner plate because it’s used first, and it’s exactly why the soup spoon and salad fork live on the outside of the flatware. Outside-in, every time.
The main course follows. This is the dinner plate, the dinner fork, and the dinner knife — the pieces closest to the plate, because they’re used after the outer ones are gone.
Dessert comes last. Since dessert is served at the end, the dessert spoon is set off on its own, above the plate and out of the way of everything else.
What is the difference between a formal and informal table setting?
The honest answer: an informal setting is the formal one with the extra pieces removed. Same logic, fewer items.
An informal table setting — the everyday version, and what most dinner parties actually call for — keeps it to the essentials: charger or placemat, dinner plate, one salad plate or bowl, a napkin, a fork, a knife, a spoon, and a water glass. It’s the six-step formula above, and it’s genuinely all you need to host beautifully.
A formal table setting adds courses, and each course brings its own piece — a soup spoon, a salad fork, a bread plate with its own knife, a dessert spoon set above the plate, and separate glasses for water, white wine, and red wine. That’s the labeled diagram above. The arrangement isn’t different; there’s just more of it, still placed in outside-in-by-course order. Museums like the Victoria and Albert Museum have whole collections tracing how those extra pieces evolved alongside the dinner party itself.
For almost everything you’ll host at home, informal isn’t a lesser choice — it’s the right choice. Save the full formal setting for the rare occasion that genuinely calls for it.
How do you style a centerpiece?
Once the place settings are done, the centerpiece is where you get to relax a little. It does not need to be elaborate or expensive — mine almost never is.
You can build a centerpiece from things you already have at home. One I come back to constantly: a basket, a lace cloth or runner, and a few faux plants and stems tucked in. That’s it. Keep it low enough that everyone can see across the table and talk to each other — anything taller than about twelve inches starts getting in the way of conversation.
If you want to lean seasonal, swap the elements with the calendar: branches and a linen runner in spring, candles and greenery in winter. The setting underneath stays exactly the same — only the centerpiece changes — which is the whole point of having a formula. You learn it once, and then every table you ever set is just a variation on it.

Table Setting FAQ
Where does the napkin go when setting a table?
The napkin can go in one of three places: on top of the plate (or the salad bowl, if you’re using one), tucked just to the left of the fork, or slipped through a napkin ring and rested on the plate. Any of the three is correct — choose based on the look you want.
Which way should the knife blade face?
The knife blade should always face in, toward the plate. This is standard etiquette, and it also simply looks tidier and is safer for the person sitting down. It applies to both formal and informal settings.
Do you really need a charger plate?
No — a charger is optional. It adds a finished, layered look and protects the table, but a placemat does the same anchoring job, and a bare table works too. If you skip the charger, just center the dinner plate where the charger would have been.
Where do the glasses go in a place setting?
The water glass goes in the top right corner of the setting, just above the knife. If you’re serving wine, the wine glass sits to the right of the water glass. Glasses are always grouped above the knife and spoon, never on the fork side.
How do you set a table for a casual dinner party?
Use the informal formula: charger or placemat, dinner plate, salad plate or bowl, napkin, fork on the left, knife and spoon on the right, and a water glass above the knife. Add a simple low centerpiece, and your casual dinner party table is done.

About the Author
Liz Lovery
Liz is the designer, renovator, and writer behind Lovery. Since 2020 she and her husband have renovated multiple homes — and she’s spent years learning, the hands-on way, how to make a house feel warm, gathered, and genuinely lived-in. She writes about renovations, DIY, homemaking, and hosting for a home you never want to leave.