Lovery

Hosting & Gatherings

How to Style a Beach Picnic That Actually Works (My Real Packing List + What I'd Skip)

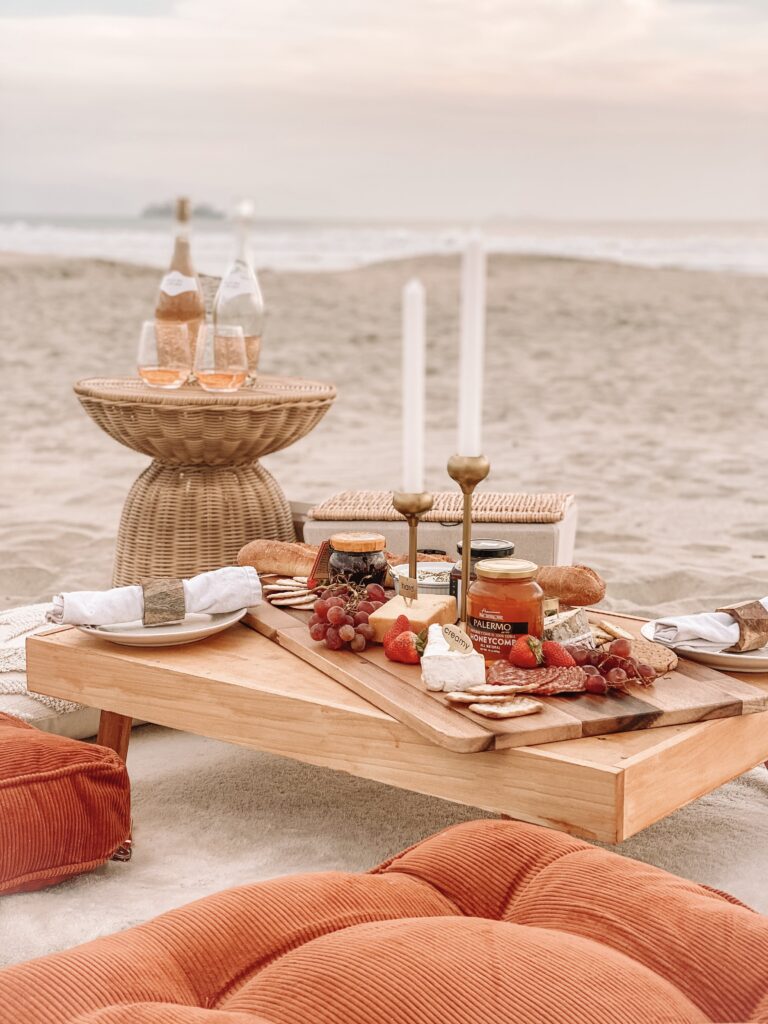
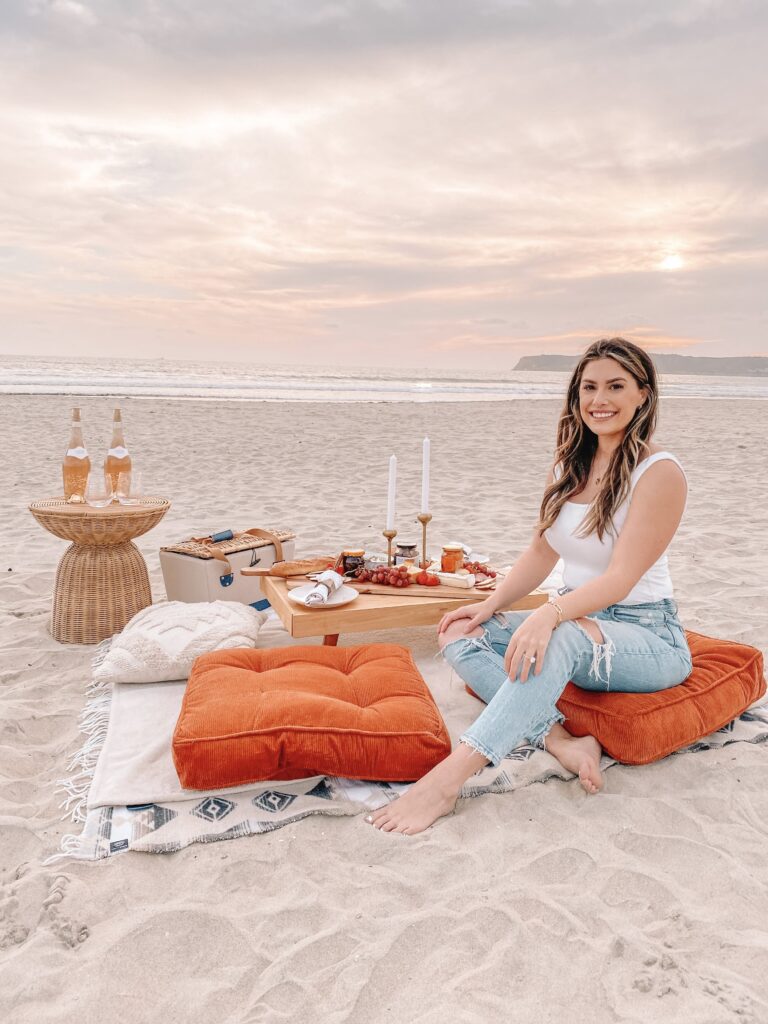
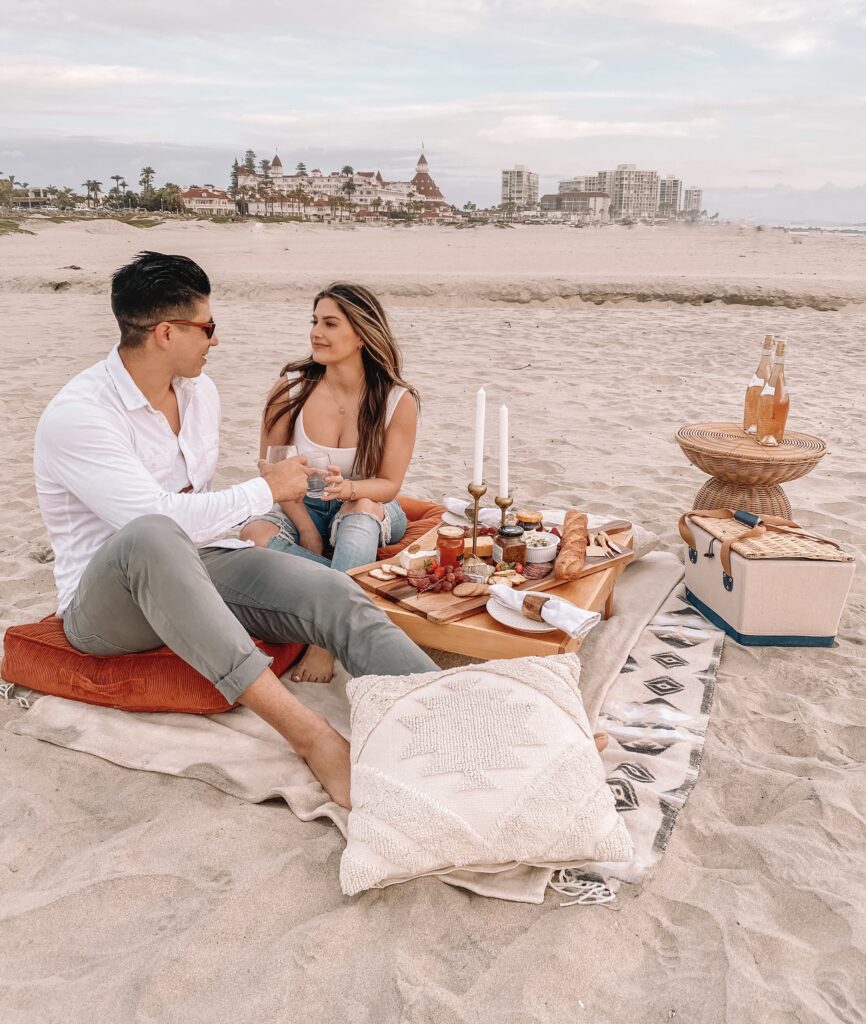
Liz Lovery styling a beach picnic on Coronado at sunset — cream blanket, low wooden table with charcuterie, wicker side table with rosé, and burnt-orange floor pillows on the sand

A designer's guide to a beach picnic that holds up in real life — the setup that has been pinned thousands of times, refined three picnics later, with the things Pinterest doesn't tell you.

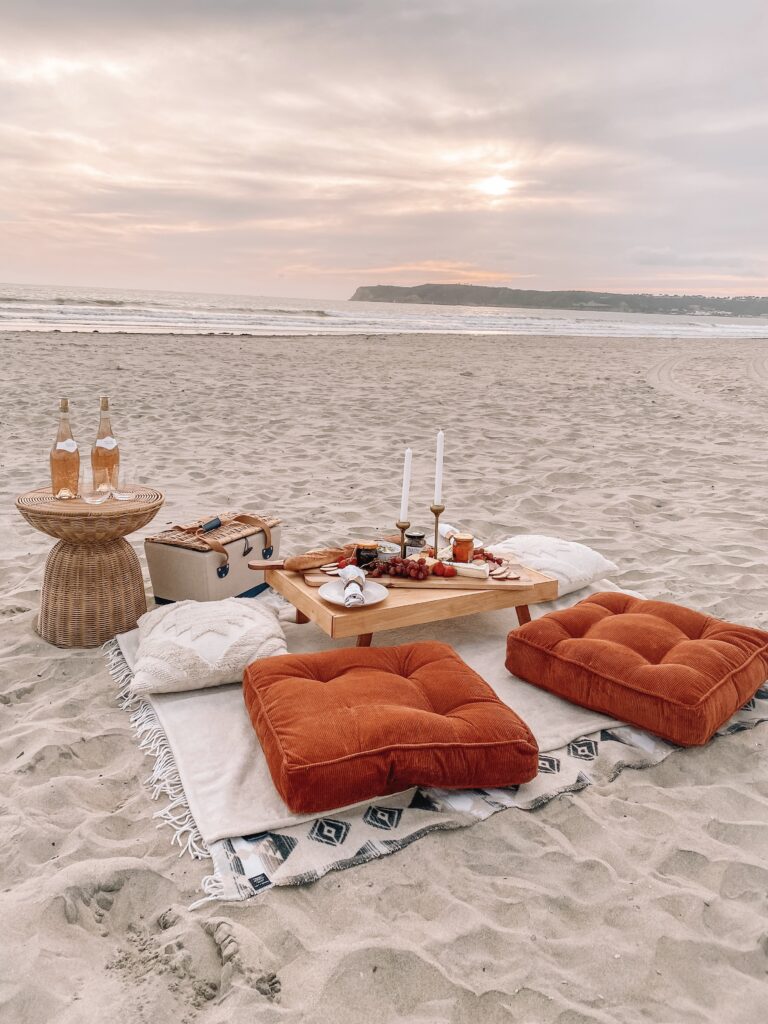
Five years ago I styled a beach picnic on Coronado at golden hour, cream blanket, two orange floor pillows, a wooden charcuterie board the size of a coffee table, two bottles of rosé sweating on a wicker side table. The light hit and the photo did what photos do. It pinned thousands of times. Years later it's still one of the most-viewed posts on this site, and people still find it by Googling "diy beach picnic" and "beach picnic set up".

I've done a few more of these since. Real ones with friends, with my husband Ryan, once for a baby announcement I never ended up sharing. And here's the part Pinterest doesn't tell you: a beautiful beach picnic in real life is mostly a logistics problem dressed up as a styling project. The wind takes your napkins. Sand gets in everything. The wine warms up faster than you can drink it. The photo you saw was a real moment, but it was also the result of about a hundred small decisions most of which I'd make differently now.

So this is the rewrite. Same setup that's been working for years, refined with everything I've learned the hard way. Real packing list, real opinions about what's worth bringing and what isn't, real menu, and the five rules I now follow every single time. Mostly written for the beach, but the same setup translates almost exactly to a backyard, a park, or a rooftop — if you can do it on sand, you can do it anywhere.

Shop the Post

Shop Hosting & Entertaining

Pinterest vs. Real Life: What Actually Changes Once You're on the Sand

I want to start here because it's the part nobody writes about, and it's the part that determines whether you have a great evening or pack up early in a sandy huff.

A Pinterest beach picnic is photographed in about a 90-second window: between the wind dying down and the sun setting, when the light is amber and everyone's glass is full and nobody has had to chase a napkin yet. A real beach picnic happens over two to three hours. The wind picks up. The sun moves. Sand kicks up every time someone walks past. The cooler ice melts. Someone has to pee. Three years of these have taught me that the trick is to plan for the real version, not the photo version, and the photo version will happen on its own when the conditions cooperate.

In practice that means: heavier than you think (so the wind doesn't move your setup), more compact than you think (because you're carrying everything across sand), and food that survives 60-90 minutes at ambient temperature without anyone worrying about it. We'll get to all of that.

The other thing that's different in 2026: a lot of beaches now require permits for setups bigger than a basic blanket-and-cooler situation. Coronado, Santa Monica, Malibu, most of San Diego — anything that involves a low table or floor seating in a designated permit zone is technically rentals/events territory. Smaller setups with a blanket and a low folding tray are almost always fine. Worth looking up the rules for your specific beach before you haul everything down to the sand.

Beach picnic at sunset on Coronado — wicker side table, low wooden table, cream blanket, and floor pillows with the sun setting over the water

The Packing List: 14 Things That Earn Their Place

I organized this list by category instead of by importance, because importance is a function of your beach, your group, and your day. A few of these I won't go without. A few are nice-to-have. I flag both honestly.

The base layer

Beach blanket. The thicker the better. Most "beach blankets" you see online are basically tablecloths — thin woven cotton that lets sand right through. I bring a heavyweight Turkish-style cotton blanket, the kind with fringe and some weight to it, that doubles as a throw at home in cooler months. The dual-use rule applies to almost everything in this list: if it doesn't earn a place in your house when it's not at the beach, it probably isn't worth buying.

Floor pillows. These are the single biggest visual upgrade for the smallest amount of effort. I have two oversized burnt-orange corduroy floor pillows that get used about half the year for outdoor seating and the other half stacked in a corner of my office. If I were buying again I'd get three or four instead of two — a beach picnic is much better with extras for back support, and they double as the comfortable lean-back spot once dinner is over.

Cream throw pillows. Two or three, neutral, with a little texture (bouclé, linen, ribbed). They make the space feel like a room instead of a setup. They also stay clean longer than you'd think, because the sand mostly stays on the blanket layer.

What I'd skip: those tasseled "sand-proof" microfiber beach blankets from Amazon. They feel synthetic, they slip on the sand, and they don't hold up after one wash.

The table

Low folding picnic table. Genuinely the hardest item on this list to source well. We ended up DIYing ours — Ryan built a low pine slab table that breaks down into two pieces and packs flat. If you can find a real one, the sweet spot is ~36" long, ~16" wide, and 9-12" tall. Anything taller and the floor pillows don't work. The folding sand-table options I've seen online either look like camping gear or fall apart in a season.

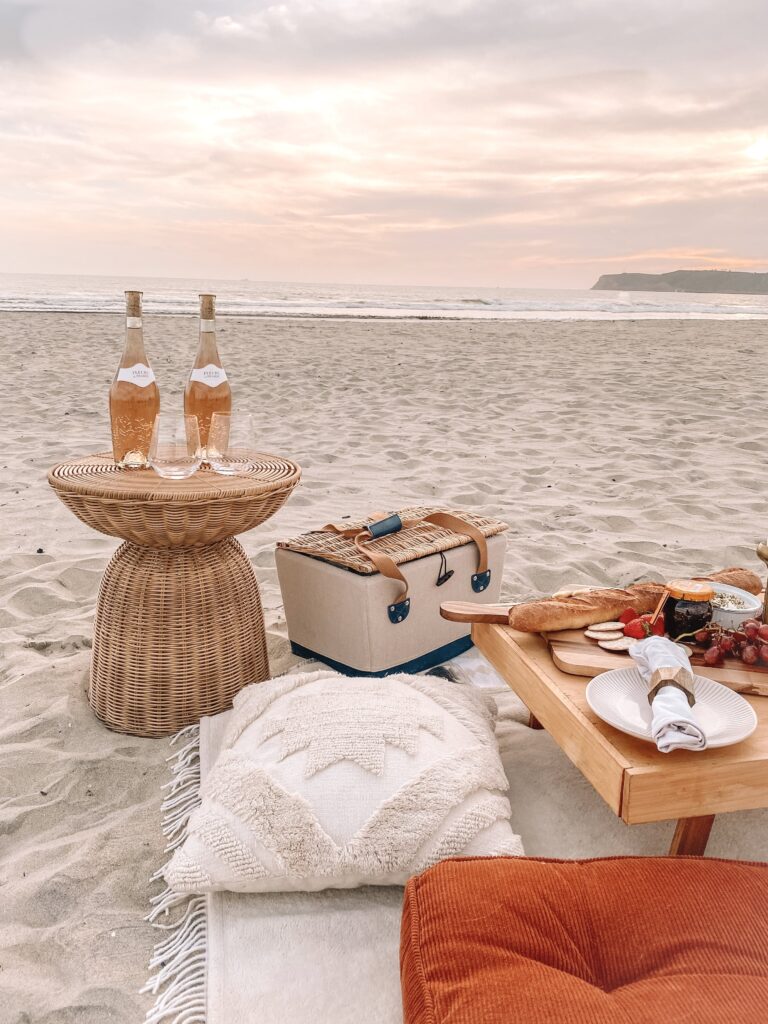
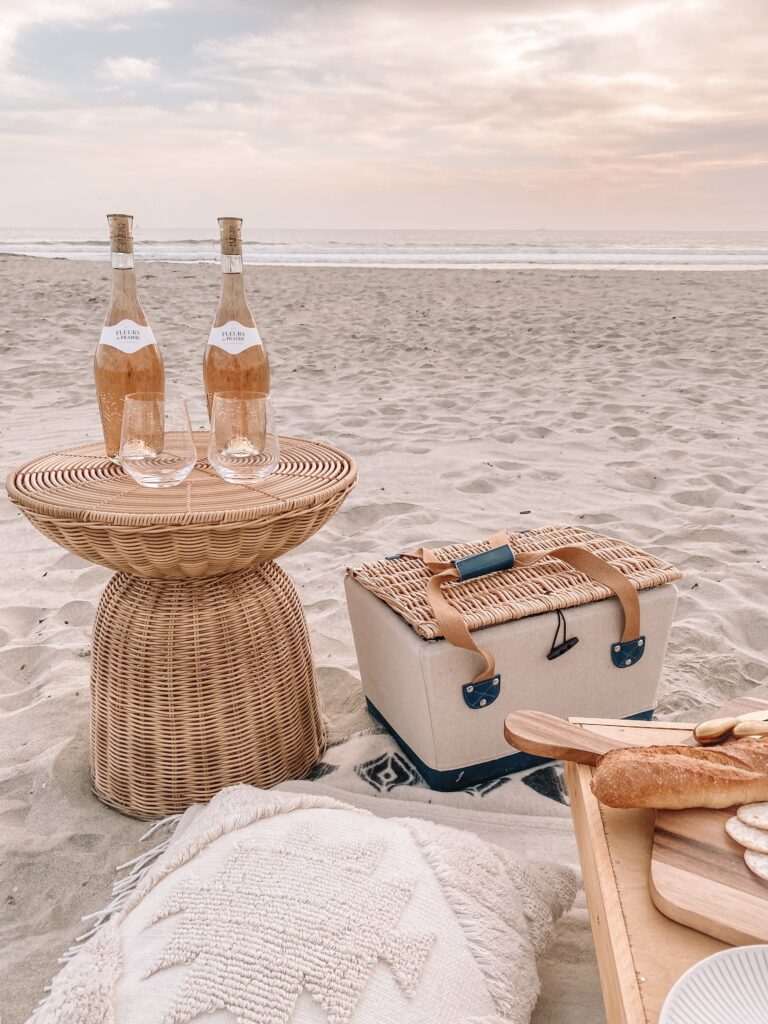
Wicker side table. This one I went back and forth on, and I'm officially in the keep-it camp. The case against: it's another thing to carry. The case for: it gives the wine and water bottles a home that's above sand level, which means fewer spills and fewer gritty drinks. I use a small drum-shaped wicker side table with a flat top. At home it lives in our living room next to the chair Ryan reads in.

Fleurs de Prairie rosé bottles in stemless glasses on a wicker side table with a picnic basket beside it on the sand

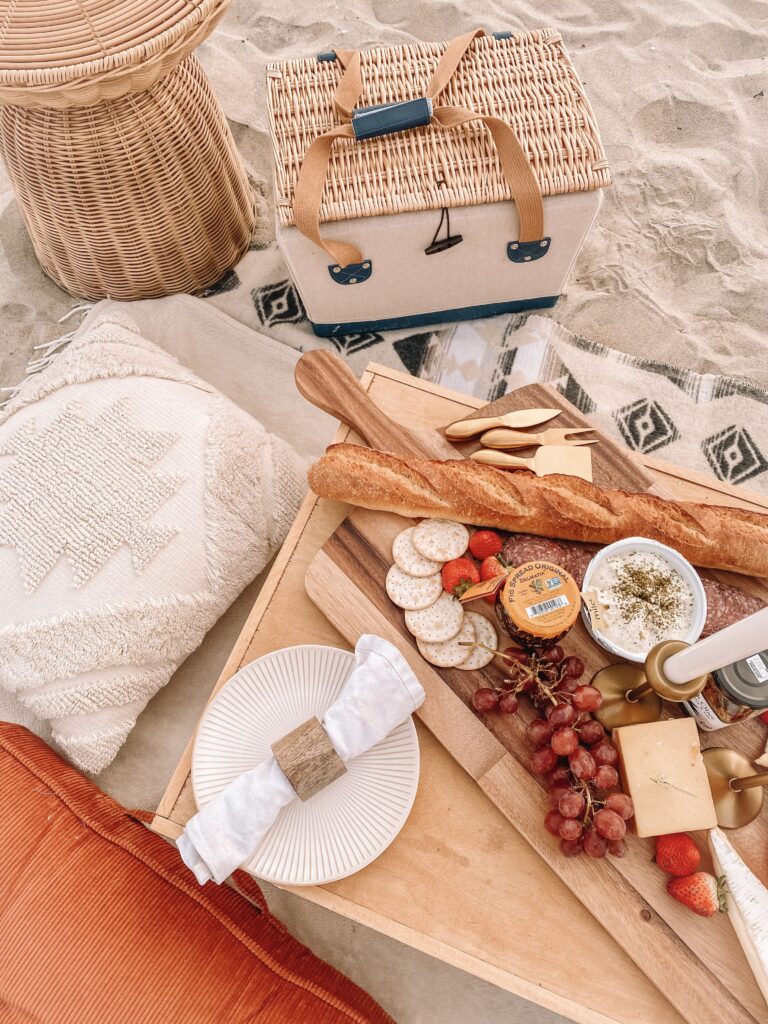
Extra-large wooden cheese board. When I bought mine I genuinely thought I'd ordered the wrong size — it's much bigger than what most people use as a serving board. That turned out to be exactly right for a setup like this. It anchors the table visually, holds an entire charcuterie spread without anything falling off the edges, and it's heavy enough that a gust of wind doesn't move it. Real wood, not bamboo. Bamboo splits.

Ceramic plates. Real plates, not paper. This is the line that separates a beach picnic from a beach lunch. I have a set of four small ceramic plates with a slightly tonal pattern — not white, not loud. The first time I packed them I was nervous about breakage. They've survived three years of use, and I've never broken one on the beach (knocking on wood, literally, the picnic table is right there).

Light, linens, the small things

Brass candleholders + dripless candles. Two tall, two short. The candles only really work in the last 30-45 minutes once the wind dies down at sunset — before that they'll blow out three times — but when they catch they make the whole table. Get the dripless kind. Hot wax on a wooden cheese board is not a vibe.

Cloth napkins. Heavier than you think you need. Linen napkins are beautiful but they fly. I use unhemmed cotton ones with weight to them. Four for two people, six for four people — you'll use more than you expect with cheese.

Stemless wine glasses. This is non-negotiable. Stemmed glasses tip in the sand the moment you set them down. Stemless plus a shallow base equals a glass that survives the evening. Real glass, not acrylic — you can feel the difference, and you're only carrying four of them.

Cheese knife set + cheese markers. A small three-piece cheese knife set takes up almost no space. Cheese markers (the little chalkboard tags with a wax pencil) feel fussy until you watch your friend pick up a triple-cream brie thinking it's the manchego. Worth it.

Napkin rings. Honestly: skip these unless you love them. They photograph beautifully and add nothing functional. I sometimes use them, sometimes don't. The post used to say they "give it that wow factor." The truer thing is they're a small touch that some people love and some people don't. Use what you have.

The cooler, the carry, the cleanup

A real picnic basket (or, better, a picnic backpack). I changed my mind on this one. The original post pointed to a traditional wicker picnic basket and that's what's in all the photos. It's beautiful. It's also a wrist-killer to carry across half a beach. The thing I actually use now is a soft-sided picnic backpack — it has the plates and utensils built in, and a separate cooler compartment. Less photogenic, infinitely more practical.

A real cooler with real ice. Not a styled basket pretending to be a cooler. A small hard-sided cooler that fits two bottles of wine and four sparkling waters with room for ice. I tuck it behind the wicker side table so it stays out of frame, and the wine actually stays cold for three hours. You will be very, very glad you did this.

What to Actually Put on the Charcuterie Board

Charcuterie is the answer to a specific question, which is: what travels well, holds at ambient temperature for an hour, requires no plates beyond what you brought, and looks unbelievable on a wooden board? Almost nothing else passes all four tests. This is why every "luxury picnic" you've ever seen is built around a board.

My rule of thumb is two cheeses, two meats, one soft thing (something spreadable), and three to five accompaniments. Don't overload. The board photographs and eats better when there's some breathing room.

What I Actually Pack

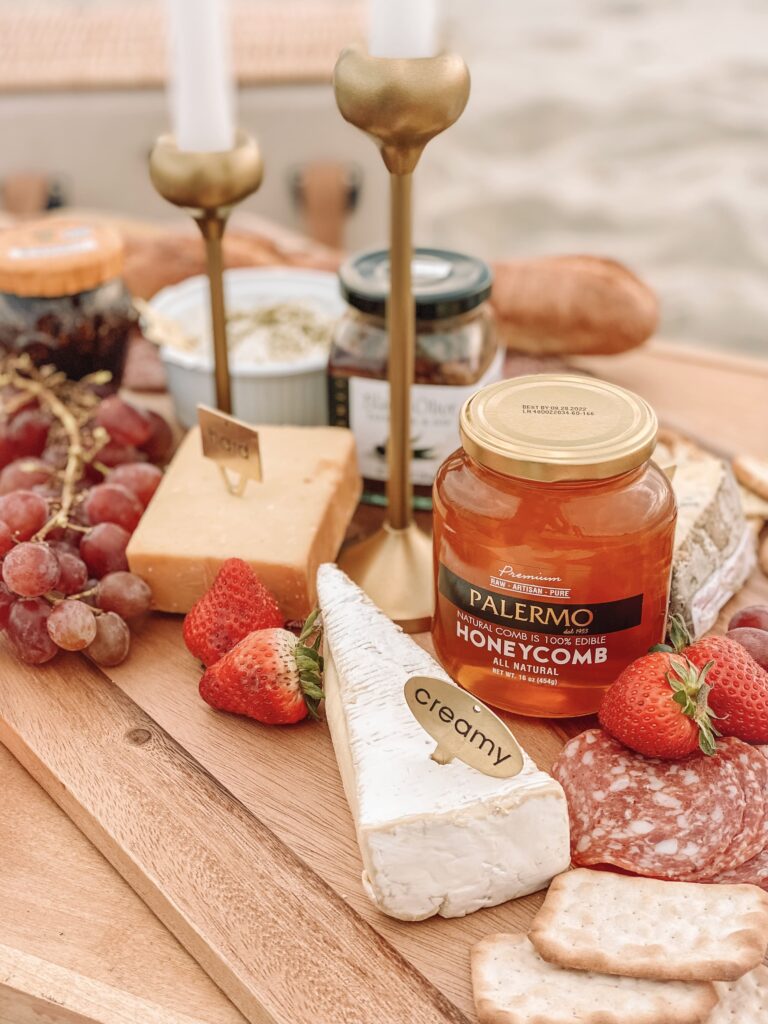
Charcuterie board on a low wooden picnic table with cheeses, prosciutto folded into ribbons, honeycomb, fresh grapes, dried figs, marcona almonds, and a small bowl of fig spread
  • Cheese, two kinds. A soft (triple-cream brie or burrata if you're going to eat it within an hour) and a hard (manchego, aged cheddar, or a Spanish-style aged sheep's milk). Avoid blue — it travels poorly and divides the table.
  • Cured meat, two kinds. Prosciutto folded into ribbons (this matters — flat slices look sad, folded looks intentional) and a salami of some kind. I do a fennel salami when I can find it.
  • Honey or honeycomb. The single biggest visual upgrade on the board. Real honeycomb, not a jar of honey. Pairs with the brie and the manchego both.
  • Fruit, fresh and dried. Grapes (the small ones, on the stem), strawberries, and dried figs or apricots. Berries get bashed in transit — grapes and strawberries are sturdier.
  • Crackers and a baguette. A simple seeded cracker plus a small baguette torn (not sliced) into rough pieces at the picnic. Torn bread looks better than sliced and it's less to do at home.
  • Nuts. Marcona almonds, salted. They tuck into all the empty spaces on the board and look like you tried harder than you did.
  • A jam or spread. Fig jam, hot honey, or a quince paste (membrillo). Pick one, don't do all three.
  • The order of operations: cheeses on first (anchor the board), meats next (folded into ribbons or stacked), spreadables in small ramekins, then fill the empty space with fruit, nuts, and crackers. I do the whole thing at home in the kitchen, cover it with foil, and unwrap it at the picnic. Trying to assemble a board on a beach in the wind is a small kind of heartbreak.

What to Drink

A bottle of dry rosé (the lighter, drier kind — nothing sweet) plus sparkling water. That's it. Don't overthink it. Wine that pairs with everything, water that resets the palate, both cold from the cooler. If it's hot, double the sparkling water.

How I Set the Whole Thing Up, in Order

Setup takes about 20 minutes if you've done it before. The order matters because the wind is going to do whatever the wind is going to do, and you want the heavy stuff anchored first.

  • Pick your spot. About 30-50 feet back from the waterline (high tide is real). Look for a slight natural windbreak — a dune, a rock outcrop, even a slight slope. East-facing if you can get it, so the sun sets behind you and the light is on your faces.
  • Lay the blanket first. Smooth it. Tuck the corners under if it's windy.
  • Position the low table in the center. It anchors everything. The floor pillows go on the open side, the throw pillows on the side facing the water.
  • Wicker side table to one side, slightly behind the floor pillows. This is where the wine and water live, and where the cooler hides behind.
  • Set the table while you're still vertical. Plates first, napkins second, glasses third, candleholders last. Don't light candles until the last 30 minutes — the wind will win until then.
  • Unveil the cheese board last. Right before you sit down. The longer it's out, the warmer the cheese gets.
  • Sit. Pour. Stay until the light changes twice.
Wicker side table on the beach with two stemless wine glasses and a bottle of dry rosé chilling at sunset

My Five Rules for a Beach Picnic That Doesn't Fall Apart

After years of these I've narrowed it down to five things. None of them are about styling. All of them are about logistics. Get these right and the picnic is good even if everything else is just okay.

Heavier than you think

Every piece of your setup should have enough weight that a gust of wind can't move it. The cheese board, the floor pillows, the candleholders. If something is light enough to blow away, leave it home or weigh it down.

Compact more than you think

You're carrying everything across sand, sometimes a quarter mile from the parking lot. Every item earns its place. If you have to ask "do I really need this," you don't.

Cold means cold

A real cooler with real ice, hidden behind the side table. Not a styled basket pretending to be one. Warm rosé is sad. So is warm sparkling water.

Light moves fast

You have about a 90-minute window from peak afternoon glare to full sunset. Plan for the wind to die down in the last 30 minutes — that's when candles work and the light is best. Don't try to peak-light an early-afternoon setup. You'll wait.

Pack it out

Everything you brought, you take. Including napkin crumbs, including grape stems, including the wax bits from the candles. A trash bag tucked into the picnic basket from the start, not as an afterthought. The beach picnic ethic that lets all of us keep doing this is leave-no-trace.

Common Questions About Beach Picnics

How do I keep the wine cold?

Real cooler, real ice, hidden behind the side table or a floor pillow. Insulated wine sleeves are nice but they're a supplement, not a replacement — they buy you about 30 minutes. The cooler is the foundation.

What about sand getting in the food?

Three things help: keep food covered until you're ready to eat, set the cheese board on a stable surface (the low table), and — the most underrated tip — don't walk past your own setup. The sand kicked up from your own steps is the sand that ends up in your wine. Set up, then sit down, then stay.

Is a beach picnic worth doing for two people, or do I need a group?

Two is my favorite size. Honestly. A group of four works and is fun, but two is more romantic, less coordination, less stuff to carry, and you don't need anyone's schedule to align except your own. Most of the best ones I've done have been just me and Ryan.

What's the one thing you'd tell someone trying this for the first time?

Pack less than you think you need. Bring water, wine, a real cheese board, a heavy blanket, and good company — and forget half the rest. The picnic is not the props. The picnic is the long, slow hour where the light changes and you didn't check your phone.

Shop the Setup

Shop Hosting & Entertaining
Liz Lovery, founder of Lovery

About the Author

Liz Lovery

Liz is the designer, renovator, and writer behind Lovery. Since 2020 she and her husband have renovated multiple homes — and she's spent years learning, the hands-on way, how to make a house feel warm, gathered, and genuinely lived-in. She writes about renovations, DIY, homemaking, and hosting for a home you never want to leave.

Latest Posts